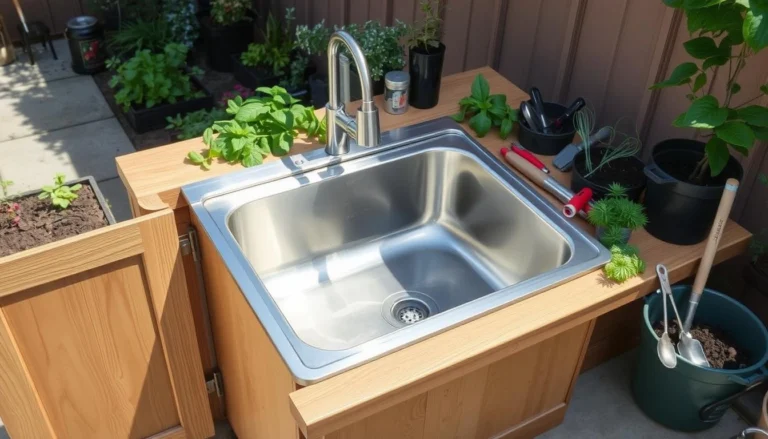
How to Build a Low-Budget DIY Outdoor Kitchen Sink: Complete Guide
Essential Materials for Your Low-Budget DIY Outdoor Kitchen Sink
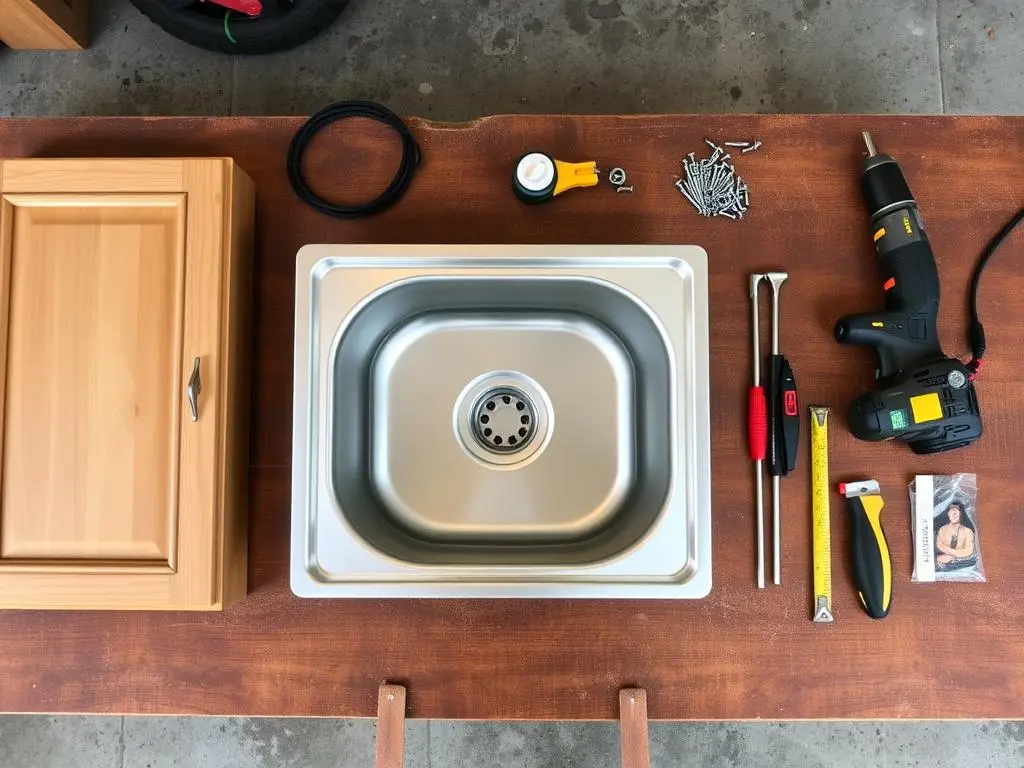
Before diving into construction, gather these affordable materials. Many can be found at thrift stores, salvage yards, or even in your own garage.
Basic materials needed for your budget-friendly outdoor sink project
Basic Materials List
- Sink basin (new budget option or repurposed from thrift store)
- Base structure (repurposed cabinet, cinder blocks, or wooden frame)
- Plumbing supplies (faucet, flexible hoses, connectors)
- Drainage solution (bucket system or simple PVC pipe)
- Water supply option (garden hose adapter or water container)
- Waterproofing materials (silicone caulk, water-resistant paint)
- Fasteners (screws, nails, brackets as needed)
- Optional countertop material (plywood with laminate, concrete, or reclaimed wood)
Tools You’ll Need
- Drill with various bits
- Screwdriver set
- Measuring tape
- Level
- Caulking gun
- Saw (if cutting wood or PVC)
- Adjustable wrench
- Utility knife
Money-Saving Tips for Sourcing Materials
The key to a truly low-budget outdoor kitchen sink is knowing where to find affordable materials without sacrificing quality.

Thrift stores are excellent sources for repurposed sink bases
Where to Find Budget-Friendly Materials
For the Sink Basin:
- Thrift stores and secondhand shops
- Habitat for Humanity ReStore
- Facebook Marketplace or Craigslist
- End-of-season clearance at home improvement stores
- Restaurant supply liquidation sales
For the Base Structure:
- Repurposed furniture (old cabinets, dressers)
- Pallets (free from many businesses)
- Cinder blocks (affordable at hardware stores)
- Scrap lumber from construction sites (ask first!)
- Leftover materials from previous projects
Creative Repurposing Ideas
- Transform an old dresser by waterproofing the top and adding a sink
- Stack cinder blocks in a pattern for an industrial-modern look
- Use a metal wash tub as both a structure and a sink basin
- Repurpose an old grill cart or potting bench as your sink base
- Convert a barrel or large planter into a unique sink station
“I built my entire outdoor sink using a $15 cabinet from a garage sale and a $10 utility sink from the ReStore. Total project cost was under $75 including all plumbing supplies.”
Design Options for Your Low-Budget Outdoor Kitchen Sink
Choose a design that matches your outdoor aesthetic while keeping costs down. Here are three popular styles that work well with budget materials.
Rustic Farmhouse

- Reclaimed wood construction
- Galvanized metal basin
- Vintage or repurposed faucet
- Simple open shelving below
Modern Minimalist

- Cinder block or simple frame base
- Concrete countertop (DIY mix)
- Stainless steel basin
- Clean lines and minimal decoration
Practical Utility

- Pressure-treated lumber frame
- Deep utility sink basin
- Hose attachment capabilities
- Tool storage integration
Building Your Sink Base Structure
The base structure provides support for your sink and determines its height and stability. Here are instructions for three affordable base options.

Building a simple wooden frame base provides durability at low cost
Option 1: Repurposed Cabinet Base
- Select a sturdy cabinet that’s the right height for comfortable use (typically 36″ tall).
- Remove any interior shelving that might interfere with plumbing.
- Reinforce the cabinet with additional screws if needed.
- Apply exterior waterproof paint or sealer to all surfaces.
- Add adjustable feet if the ground is uneven.
- Cut a hole in the top for your sink basin using the template that came with your sink or by tracing the basin.
Option 2: Cinder Block Base
- Create a level surface where your sink will stand.
- Arrange cinder blocks in a pattern that provides adequate support (typically 2-3 blocks high).
- For a more finished look, use construction adhesive between blocks.
- Add a treated wood top frame to support your sink and countertop.
- Optionally, paint the cinder blocks with exterior masonry paint.
Option 3: Simple Wooden Frame
- Cut pressure-treated 2x4s to create a frame 36″ tall and sized appropriately for your sink.
- Assemble the frame using exterior screws and galvanized brackets.
- Add diagonal bracing for stability.
- Attach treated plywood or deck boards to create a top surface.
- Apply several coats of exterior waterproof sealer to all wood surfaces.
- Cut an opening for your sink basin.
Height Tip: Standard kitchen counter height is 36 inches, but you might prefer your outdoor sink slightly lower (34 inches) for washing large items or slightly higher (38 inches) to reduce back strain.
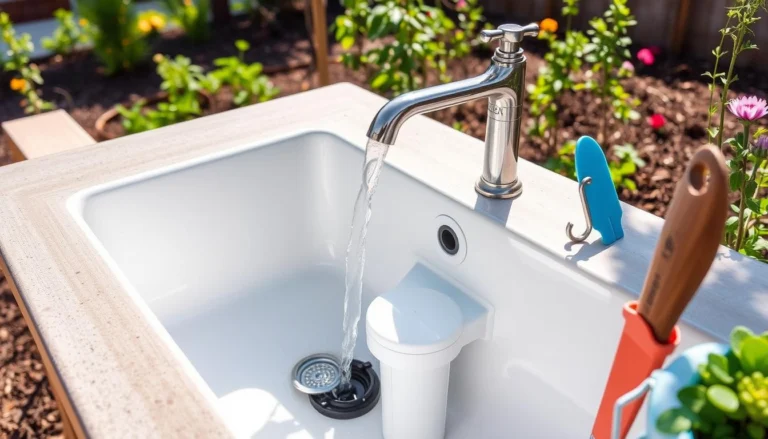
Installing Your Sink Basin and Countertop
Once your base is ready, it’s time to install the sink basin and create a functional countertop surface.

Proper sealing around your sink basin prevents water damage
Sink Basin Installation
- If using a countertop, cut the hole according to your sink’s template or by tracing the basin.
- Apply a bead of silicone caulk around the rim of the hole.
- Place the sink basin into the hole and press firmly.
- From underneath, attach any clips or fasteners that came with your sink.
- Wipe away any excess silicone that squeezed out.
- Allow the silicone to cure according to the manufacturer’s instructions (typically 24 hours).
Budget-Friendly Countertop Options
Plywood with Laminate:
- Use 3/4″ exterior-grade plywood as the base
- Cover with affordable laminate sheets
- Seal all edges with silicone caulk
- Total cost: $30-50
DIY Concrete:
- Build a simple form with 2x4s
- Mix concrete according to package directions
- Pour, level, and allow to cure
- Seal with concrete sealer
- Total cost: $20-40
Reclaimed Wood:
- Source pallet wood or old fence boards
- Sand thoroughly to prevent splinters
- Arrange in a pattern and secure to plywood base
- Seal with multiple coats of exterior polyurethane
- Total cost: $10-30
Tile on Cement Board:
- Use cement board as the base
- Apply clearance or remnant tiles with thinset
- Grout with outdoor-rated grout
- Seal completely to prevent water damage
- Total cost: $40-60
Simple Plumbing Solutions for Your Outdoor Sink
Plumbing an outdoor sink can be much simpler than indoor plumbing. Here are affordable options that don’t require professional help.

A simple garden hose adapter provides an easy water supply solution
Water Supply Options
Garden Hose Connection:
The simplest and most affordable option.
- Purchase a faucet with a hose thread adapter ($15-25)
- Connect the standard garden hose to the faucet
- Use a Y-splitter at your spigot to maintain garden hose use
- Consider a quick-connect system for easy winter disconnection
Gravity-Fed Water Container:
Perfect for locations without easy hose access.
- Mount a 5-gallon container above sink height
- Install the spigot at the bottom of the container
- Connect tubing from the spigot to the faucet
- Refill container as needed
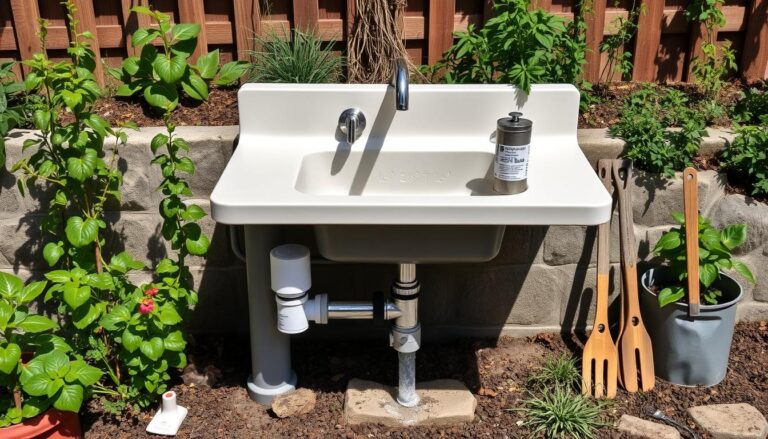
Drainage Solutions

A simple bucket collection system provides eco-friendly drainage
Collection Bucket:
Simplest solution with eco-benefits.
- Place a 5-gallon bucket under the sink drain
- Connect the sink drain to the bucket with a flexible PVC pipe
- Use collected gray water for plants (if using biodegradable soap)
- Empty bucket as needed
French Drain:
A more permanent solution for frequent use.
- Dig a 2′ deep, 1′ wide trench away from the sink
- Fill with gravel and a perforated pipe
- Connect the sink drain to the perforated pipe
- Cover with landscape fabric and more gravel
Winter Preparation: In cold climates, disconnect and drain all water lines before freezing temperatures arrive. Store faucet components indoors to prevent damage.
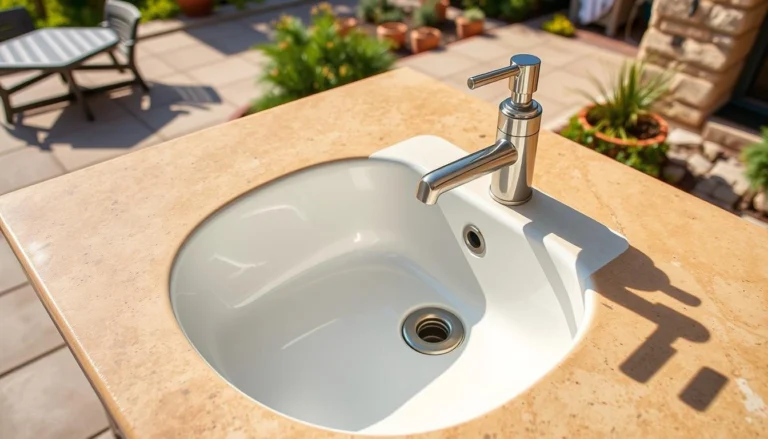
Installing Your Faucet
The faucet is a key functional element of your outdoor sink. Here’s how to install one properly while keeping costs down.

Installing a faucet is straightforward with the right connections
Choosing an Affordable Faucet
- Look for clearance items or open-box returns at home improvement stores
- Consider using a utility sink faucet (typically less expensive than kitchen faucets)
- Check online marketplaces for used but functional faucets
- Choose a simple single-handle design for easier installation
- Ensure it has standard connections that will work with your water supply
Basic Faucet Installation Steps
- Apply plumber’s tape to all threaded connections to prevent leaks.
- Insert the faucet through the hole(s) in your sink or countertop.
- From underneath, attach the washers and nuts that secure the faucet.
- Connect the water supply line(s) to the faucet inputs.
- If using a garden hose, attach the hose adapter to the water input.
- Tighten all connections with an adjustable wrench, but don’t overtighten.
- Turn on the water and check for leaks, tightening connections if needed.
Money-Saving Tip: A standard bathroom faucet can be 30-50% cheaper than a kitchen faucet while still providing adequate function for an outdoor sink. Just ensure it has the connections you need for your water supply.
Weatherproofing Your Outdoor Kitchen Sink
Protecting your DIY sink from the elements is crucial for longevity, especially when using budget materials.
Essential Weatherproofing Steps
- Apply multiple coats of exterior-grade waterproof sealer to all wood surfaces.
- Use silicone caulk around all joints where water could penetrate.
- Install a small roof or awning above the sink for additional protection.
- Elevate the base slightly off the ground to prevent moisture absorption.
- Apply rust-resistant paint to any metal components not made of stainless steel.
- Consider a removable cover for the sink basin when not in use.
Seasonal Maintenance
Summer Care:
- Reapply waterproof sealer to exposed wood
- Check and repair any cracked caulk
- Clean the drain regularly to prevent clogs
- Inspect for insect damage or nests
Winter Preparation:
- Disconnect and drain all water lines
- Store the faucet indoors if possible
- Cover the entire sink station with a waterproof tarp
- Elevate or remove collection buckets
Important: Even with proper weatherproofing, budget materials will deteriorate faster than premium outdoor-rated products. Plan to refresh your weatherproofing annually and potentially replace some components every 2-3 years.
Customizing Your Low-Budget Outdoor Kitchen Sink
Add personality and functionality to your outdoor sink with these affordable customization ideas.

Simple additions like herb planters and tool storage enhance functionality
Functional Additions
Storage Solutions
- Add hooks for hanging tools
- Install a simple shelf underneath
- Attach a paper towel holder
- Mount a pegboard for utensils
Cooking Helpers
- Build a small cutting board area
- Add a dish drying rack
- Create a spice shelf
- Install a bottle opener
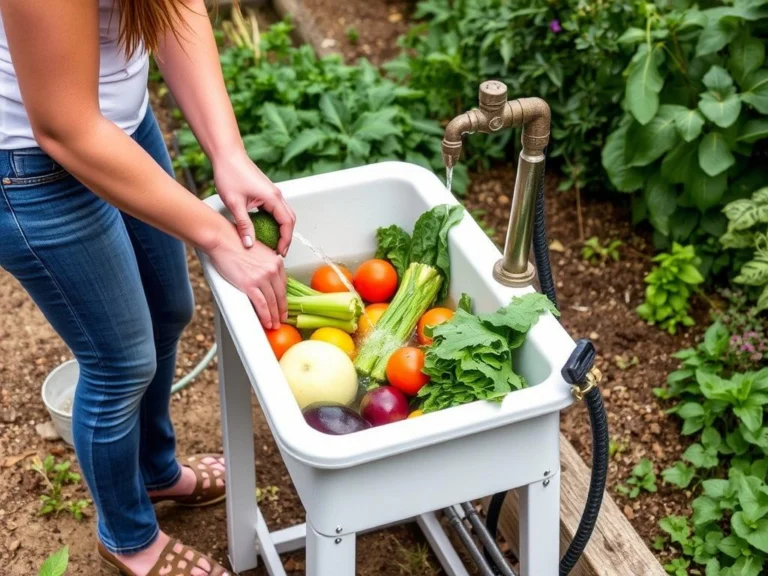
Garden Integration
- Add herb planters nearby
- Use sink water for plants
- Include a compost bin
- Create a produce washing station
Decorative Elements
- Paint with exterior-grade paint in colors that complement your outdoor space
- Add decorative tile accents (look for clearance tiles or remnants)
- Install solar-powered LED lights for evening use
- Incorporate driftwood, stones, or other natural elements
- Create a simple backsplash with leftover materials
“The best part about building your own outdoor sink is making it exactly what you need. Mine has a special area for washing garden vegetables and hooks for all my grilling tools.”
Inspiring Low-Budget Outdoor Kitchen Sink Examples
See how others have created functional and attractive outdoor sinks on tight budgets.


Example 1: The Weekend Warrior ($75 Total)
Mike built this functional sink using a salvaged cabinet, a budget utility sink, and a simple garden hose connection. The cabinet was waterproofed with exterior paint he already had, and he added a small roof using leftover shingles. Total construction time was just one weekend.
Example 2: The Concrete Creation ($60 Total)
Lisa created this modern-looking sink using cinder blocks for the base and a simple concrete countertop she poured herself. The sink basin was a clearance item, and she connected it to her garden hose with an inexpensive adapter. The entire project took two weekends to complete.
Example 3: The Pallet Upcycle ($40 Total)
Carlos built his entire outdoor sink using free pallets, a secondhand bathroom sink, and basic plumbing parts. He added a small shelf for herbs and a towel holder made from an old curtain rod. The rustic look perfectly complements his garden space.
Troubleshooting Common Issues
Leaking Connections
If you notice water leaking from pipe connections:
- Ensure all connections have plumber’s tape applied
- Check that connections aren’t overtightened (which can crack fittings)
- Verify that washers are properly seated
- Replace any cracked or damaged fittings
Unstable Base
If your sink wobbles or feels unstable:
- Add diagonal bracing to wooden structures
- Ensure the ground beneath is level and compacted
- Add adjustable feet to compensate for uneven ground
- Consider adding weight to the base (sand-filled containers work well)
Poor Drainage
If water drains slowly or backs up:
- Check for and remove any clogs in the drain pipe
- Ensure the drain pipe has adequate slope (minimum 1/4″ per foot)
- Verify that collection buckets aren’t overflowing
- Consider increasing the diameter of your drain pipe
Weather Damage
If materials are deteriorating due to weather:
- Add additional waterproof sealer to affected areas
- Install a small roof or awning for protection
- Consider replacing severely damaged parts with more weather-resistant materials
- Use a waterproof cover when the sink isn’t in use
Conclusion:
Building a low-budget DIY outdoor kitchen sink is a rewarding project that enhances your outdoor living space without breaking the bank. By repurposing materials, using simple plumbing solutions, and adding your personal touch, you’ve created a functional and attractive addition to your outdoor cooking area.
Remember to perform regular maintenance to extend the life of your outdoor sink, especially if you’ve used budget materials. With proper care, your DIY creation can provide years of convenient outdoor cooking and cleaning.
Now it’s time to enjoy the fruits of your labor! Fire up the grill, invite some friends over, and appreciate the convenience of having a sink right where you need it most—in your outdoor kitchen.