Benefits of Installing an Outdoor Sink in 2025
This guide walks you through installing an outdoor sink step by step—from planning and choosing materials to connecting water and setting up drainage—so you can confidently plan and install an outdoor sink that fits your space and budget.
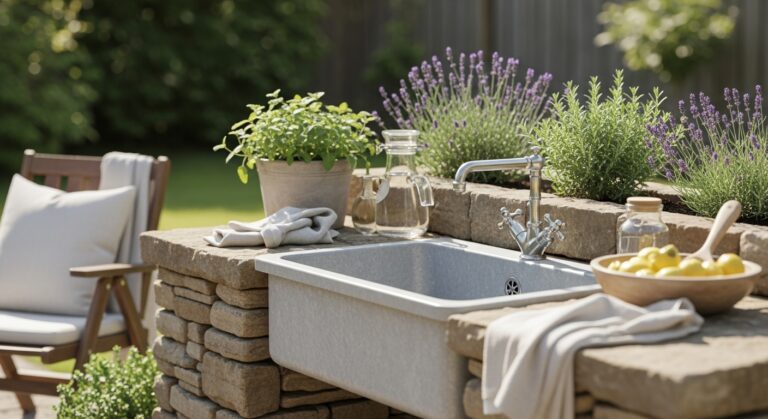
Before you start the build, consider the real, everyday advantages an outdoor sink adds to your yard or outdoor kitchen. Below are practical uses and entertaining perks that make it worth installing.
Practical Benefits
Make routine chores cleaner and faster:
- Keep dirt outside: Rinse off muddy boots and gardening gloves so you don’t track soil into the house.
- Prep fresh produce: Wash vegetables from your garden before bringing them into the kitchen.
- Protect indoor drains: Clean potting tools and brush off debris outdoors to avoid clogs inside.
- Quick handwashing: Rinse hands after yard work without walking back into the house.
- Fill watering containers: Top off watering cans and buckets at the source for faster garden work.
Entertainment Benefits
Make outdoor hosting easier and more self-sufficient:
- Cleanup station: Provide a dedicated spot for rinsing plates and utensils during outdoor parties.
- Cooler prep: Fill coolers with ice and water without using your indoor sinks.
- Rinse before bringing inside: Lightly rinse dishes or glassware before moving them to your kitchen.
- Beverage station: Convert the sink area into a drink prep zone for guests.
- Hygiene for guests: Offer easy handwashing before meals and after activities.
Planning Your Outdoor Sink Installation

Good planning cuts cost and prevents surprises. Before you buy materials or start work, evaluate location, water source, drainage, and permits so your outdoor sink project goes smoothly and fits your budget.
Choosing the Right Location
Location affects convenience, plumbing complexity, and future maintenance. When selecting a place, consider:
- Proximity to existing water lines — closer lines reduce plumbing work and cost.
- Accessibility for regular use (near the garden, patio, or an outdoor kitchen).
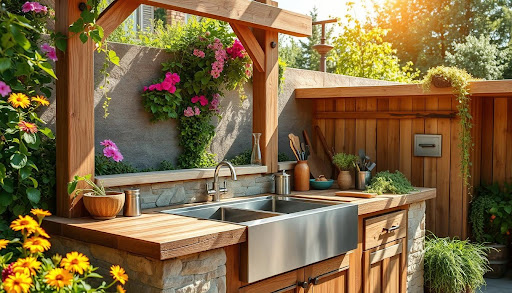
- Protection from weather — under an overhang or pergola extends fixture life.
- Available drainage options and slope to avoid pooling on the ground.
- Space for a countertop, storage, and easy access to shut-off valves for winterization.
Water Source Options
Pick the water source that fits your needs, skill level, and budget. Below are common options with quick pros and cons to help you decide:
Garden Hose Connection
Pros: Fast, inexpensive, minimal plumbing skills required — just use a hose adapter. Cons: Limited pressure/temperature options and less tidy than a permanent line. Best for temporary setups or tight budgets.
Extended Home Plumbing
Pros: Provides hot and cold water and looks permanent. Cons: Requires running water lines from your home plumbing system, more labor, and often permits — consider hiring a pro. Best when you want an integrated outdoor kitchen or full-featured sink.
Standalone System
Pros: Self-contained (tank or pump) for locations far from water lines. Cons: Needs regular refilling and pumping. Good when connecting to existing plumbing or a hose isn’t possible.
Drainage Solutions
Drainage choice determines environmental impact and permitting needs—make sure the option you choose complies with local rules.
- Connect to home plumbing: Most functional for gray-water handling but usually requires permits and proper fittings to join the home drain line.
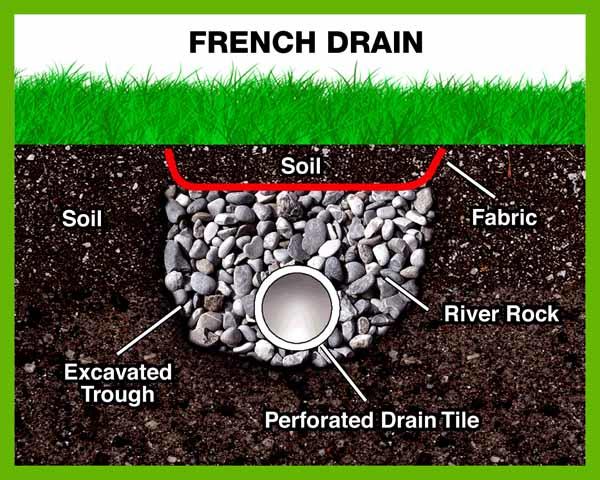
- Dry well or French drain: Good for dispersing water onsite; typically requires digging and gravel-filled chambers and should be placed away from foundations.
- Bucket system: Simple, low-permit option where you collect and empty wastewater manually — best for light, infrequent use.
- Direct to garden: Acceptable only for biodegradable soaps and where local regulations permit gray-water dispersion.
Quick decision checklist — before you install: make sure you know where the nearest water lines are, whether your municipality requires permits, and what your rough budget is for running pipes versus using a hose or tank system.
Tools and Materials Needed

Tools
Basic and plumbing-specific tools will cover most DIY outdoor sink installs. Don’t forget safety gear: gloves and eye protection when cutting or drilling.
- Tape measure
- Level
- Drill with bits
- Hole saw (for cutting sink hole in countertop)
- Channel-lock pliers
- Pipe wrench
- Screwdrivers (flathead and Phillips)
- Hacksaw or PVC pipe cutter
- Shovel (for drainage installation)
- Utility knife
Materials
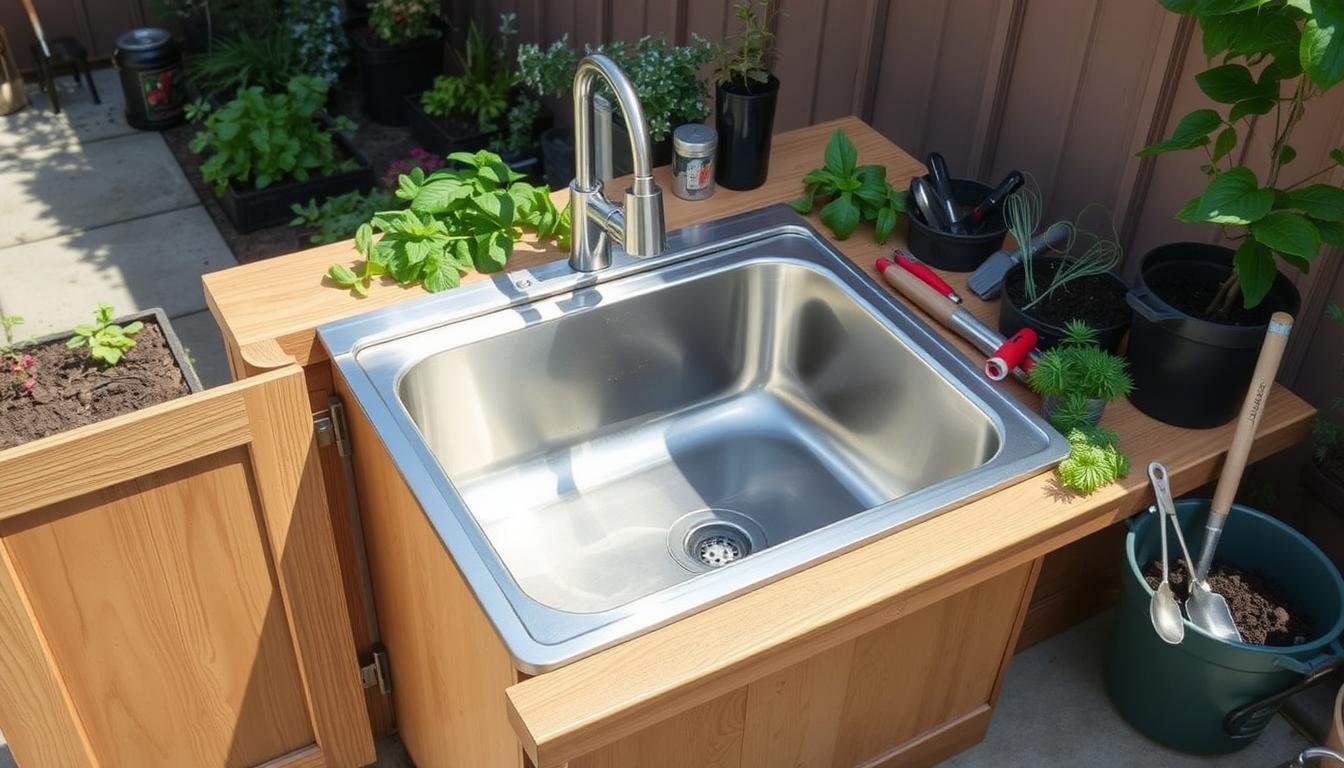
Choose outdoor-rated materials to resist weather and wear. Stainless steel is a common, durable choice—look for 304 grade for general outdoor use; 316 is better for coastal salt exposure.
- Sink basin (stainless steel recommended for durability)
- Outdoor-rated faucet (freeze-resistant if you live in a cold climate)
- PVC pipes and fittings or other outdoor-rated pipe materials
- P-trap for sink drain (use an outdoor-capable model or protect it from freezing)
- Waterproof sealant/caulk
- Plumber’s tape (PTFE tape) for threaded connections
- Sink frame or cabinet (weather-resistant)
- Bucket or drain container (if using bucket drainage)
- Gravel (for dry well drainage)
- Shut-off valves for winterizing lines
Get everything you need in one place
Estimate: basic hose-connected setups can cost under $200; a permanent home plumbing hookup with a quality stainless sink and faucet commonly ranges from $400–$1,200 depending on fixtures and labor. Adjust your budget for pipe runs, permits, and professional help.
Selecting the Right Sink and Faucet

Sink Material Considerations
Your sink material determines durability, maintenance, and appearance. Below is a quick comparison to help you choose the best option for your outdoor kitchen or yard.
| Material | Pros | Cons | Best For |
| Stainless Steel | Durable, rust-resistant, easy to clean, affordable | Can get hot in direct sunlight, may show water spots | All-purpose use, high-traffic outdoor sinks; choose 304 grade for general use or 316 near salt air |
| Ceramic | Attractive appearance, heat-resistant | Can chip or crack, heavier, more expensive | Decorative installations or covered areas |
| Stone/Concrete | Unique look, extremely durable | Very heavy, costly, needs sealing | Permanent, custom outdoor kitchen islands |
| Copper | Develops patina, naturally antimicrobial | Expensive and requires special care | Accent sinks in shaded or decorative areas |
Faucet Selection
Pick a faucet built for outdoor use. Consider these features and examples of when to choose each type:
- Weather-resistant finish (brass with PVD or stainless finishes hold up well outdoors)
- Freeze-resistant design or frost-proof faucets for colder climates
- Lever-style handles for easy operation when your hands are dirty or wet
- Compatibility with your water source — select a model with a hose adapter for garden hose connections or standard plumbing inlets for permanent water lines
- Height and reach — choose a taller spout if you plan to fill buckets or wash large pots
Sink Size and Configuration
Think about how you’ll use the sink and choose size and features to match:
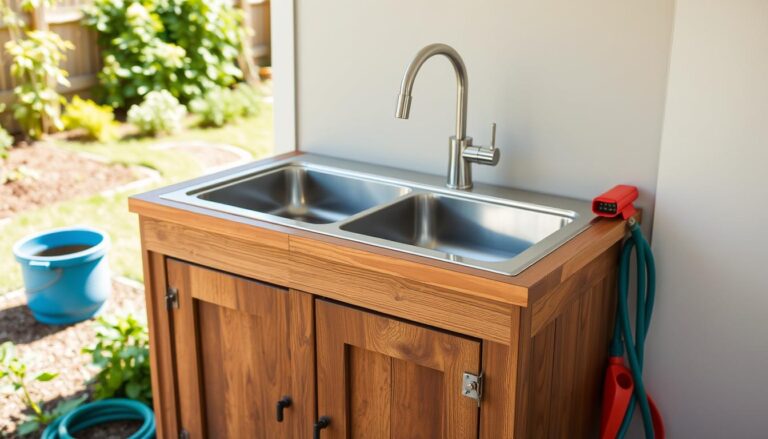
- Single bowl vs. double bowl — single bowls are simpler and often deeper; double bowls let you rinse and prep simultaneously.
- Recommended depth: roughly 8–12 inches for general outdoor tasks; deeper bowls (12″+) are helpful for large pots and cleaning tasks.
- Countertop space — measure width and length to ensure the sink fits your planned place in the outdoor kitchen or prep area.
- Installation style: drop-in sinks are easiest for DIY; undermount gives a cleaner look but may be harder to fit outdoors.
- Accessories: look for models with optional cutting boards, colanders, or integrated drain accessories that increase functionality.
Quick pick tip: if you want hot water and a polished outdoor kitchen experience, extend a water line from your home plumbing and choose a quality faucet; if you want a low-cost, simple solution, a hose-compatible faucet with a stainless drop-in sink is a great option.
Step-by-Step Installation Process

With planning and materials in place, follow these practical steps to install your outdoor sink. Where measurements or plumbing work are called out, consider whether to hire a pro—especially when tapping into existing home plumbing.
Build or Prepare the Sink Base
Construct a weather-resistant frame or cabinet to support the sink. Standard countertop height is about 36 inches for comfortable use; adjust for shorter users or ADA needs. Make sure the base is level and braced to support the sink, water, and any accessories. If you’re using an existing structure, reinforce it to handle the added weight.
Install the Sink
Use the sink template to mark the hole on your countertop and cut it with a hole saw or jigsaw as appropriate. Apply waterproof sealant around the rim, set the sink into place, and secure according to the manufacturer’s instructions. Check that the sink is level and the seal is continuous to prevent water ingress into the cabinet.

Install the Faucet
Attach the outdoor-rated faucet to the sink before final installation if possible. Wrap threaded connections with plumber’s tape (PTFE) and hand-tighten, then finish with a wrench—avoid overtightening. If using a hose-compatible faucet, confirm the adapter fits your garden hose or water line. Consider installing a faucet with a frost-proof design if your area freezes.
Connect Water Supply
Choose the connection type that matches your planning decision:
- Garden hose connection: Attach a hose adapter to the faucet and connect your garden hose. Pros: low cost, minimal plumbing work. Cons: limited temperature control and permanence.
- Permanent plumbing: Run water lines from your home plumbing system for hot and cold water. Use appropriate pipe type for outdoor installs and secure water lines every ~4 feet with clamps. Install shut-off valves near the sink so you can winterize the lines. If you’re tapping into hot water or the house drain, consider hiring a licensed plumber to meet code.
- Standalone tank/pump: Connect a pressurized tank system if water lines are impractical—use a pump and filtration as needed. This requires regular maintenance and refill planning.

Set Up Drainage
Install a P-trap (sink trap) under the sink to block sewer gases. Then pick a drainage method that suits your site and local regulations:
- Dry well / French drain: Run the drain line away from the house to a gravel-filled dry well or a French drain. A typical guideline is to place the dry well at least 10 feet from the foundation, but check local code. Build the dry well with coarse gravel and landscape fabric to facilitate percolation.
- Home plumbing connection: Connect the sink drain into your home plumbing system using proper pipe fittings and maintaining the required slope (commonly ¼ inch per foot) to prevent standing water. This option usually requires permits and inspection.
- Bucket system: Route the sink drain into a removable drain bucket for manual disposal—useful for temporary or low-use setups and where permits for discharge are restricted.

Test the System
Turn on the water supply and test all connections for leaks. Run both hot and cold (if available) and check the P-trap and drain line for proper flow and slope. Inspect hose adapters, pipe fittings, and shut-off valves. Troubleshoot common issues: tighten leaking fittings, re-seal around the sink rim, or adjust pipe slope if drainage is slow.
- Quick troubleshooting: if water pools in drain lines, verify the ¼” per foot slope and remove blockages; if a joint leaks, reapply plumber’s tape and retighten.
- Winterization tip: close shut-off valves, drain lines, disconnect hoses, and blow out lines if needed before freeze season.


Safety Tips and Considerations
Important: Always check local building codes and regulations before installing an outdoor sink. Many jurisdictions require permits for new plumbing or connections to your home’s water system—contact your municipal building department or use an online permit lookup to confirm requirements.
General Safety Guidelines
- Wear appropriate safety gear: gloves, eye protection, and hearing protection when cutting or drilling.
- Make sure to turn off the water supply before making any plumbing connections or cutting lines.
- Keep electrical sources and power tools away from water to avoid shock hazards.
- Use the right tool for the job and follow manufacturer instructions to avoid injury or damage.
- Have a helper when lifting heavy sinks, countertops, or cabinets to prevent strain and ensure safe placement.
Environmental Considerations
Plan drainage and cleaning products with the environment in mind:
- Use biodegradable, phosphate-free soaps if your drain discharges to the yard or a dry well.
- Never let paints, solvents, or harsh chemicals run into soil or storm drains.
- Install water-saving faucets or aerators to reduce water use.
- Route drainage away from sensitive plants, wells, and areas prone to erosion.
Compliance with Regulations
Regulations vary—confirm local rules and required safety devices:
- Check if a backflow prevention device is required to protect your house water supply from contamination; many municipalities require one when connecting outdoor fixtures to household lines.
- Verify minimum burial depth for water lines in your climate to prevent freezing—this depends on local frost depth standards.
- Determine whether a professional inspection or permit is needed after installation.
- Ask your local authority whether gray water reuse (directing sink discharge to irrigation) is permitted and what treatment or signage is required.
If you’re unsure about code interpretation or performing plumbing work that ties into your home plumbing, consult a licensed plumber to ensure safe, code-compliant installation.
Maintenance and Winterization

Regular maintenance keeps your outdoor sink functioning and prevents costly repairs. Follow a simple schedule and use the winterization steps below if your climate freezes.
Regular Maintenance
- Clean the sink with appropriate cleaners for the material (stainless steel cleaners for steel, non‑abrasive cleaners for ceramic) at least weekly during heavy use.
- Inspect water and drain connections monthly for leaks, loose fittings, or corrosion; tighten or replace fittings as needed.
- Clear the sink drain and strainers of debris to avoid clogs; consider a removable sink strainer to catch solids.
- Check the cabinet or frame seasonally for weather damage, rot, or rust—repair or reseal finishes as required.
- Test shut-off valves and clean aerators on the faucet to maintain water flow and efficiency.
Seasonal Maintenance
Follow these seasonal tasks to keep the system in good condition year-round:
Spring
- Reconnect the water supply if you winterized it and check for freeze damage.
- Clean and sanitize the sink after months of storage or inactivity.
- Inspect drainage lines and the dry well or drain bucket for blockages.
Summer
- Watch for leaks during peak usage and clean frequently to prevent mildew.
- Ensure all outdoor pipe fittings remain secure and exposed metal is protected from UV.
- Apply protective finishes to any wooden components.
Fall/Winter
- Prepare to winterize before the first freeze: drain lines, disconnect hoses, and cover the sink.
- Inspect insulation or heat tape on exposed lines if you plan to keep water connected.
- Store removable accessories (hoses, strainers, cutting boards) indoors.
Winterization Process
In freezing climates, follow these steps to protect water lines and the sink drain:
- Shut off the water supply at the source and close any local shut-off valves at the sink.
- Open the faucet to drain as much water as possible from the lines and trap.
- Disconnect hoses and store them inside.
- If available, use an air compressor to gently blow out remaining water from the water lines (use low pressure and consult pipe manufacturer guidance). If you don’t have an air compressor, allow lines to gravity-drain and remove inline low points where water can collect.
- For the sink drain trap (P-trap), either remove and store it indoors or pour a small amount of potable, propylene-glycol based RV/boat antifreeze (labeled safe for plumbing) into the trap—do not use automotive antifreeze. Check local guidance before using any chemical.
- Cover the sink and faucet with an insulated weatherproof cover to reduce freeze risk and protect finishes.
Frequently Asked Questions
Can I use a regular indoor sink outdoors?
Technically yes, but indoor sinks aren’t built for outdoor exposure to UV, temperature swings, or moisture. For longevity and lower maintenance, choose a sink and fixtures rated for outdoor use—stainless steel (304 for general use, 316 near salt air) is a common durable choice. When to call a plumber: if you plan to tie the sink into home water or drain lines, consult a pro to ensure proper materials and code compliance.
How deep should a dry well be for sink drainage?
A typical dry well for an outdoor sink is often 2–3 feet deep and placed at least about 10 feet from your house foundation to reduce risk of moisture issues, but exact depth and setback vary by soil type and local rules. Build the dry well with coarse gravel, landscape fabric, and a proper drain pipe to facilitate percolation. Always check local regulations before installing. When to call a plumber: for large or permanent systems, hire a professional to size and locate the dry well correctly.
Do I need a permit to install an outdoor sink?
Permit requirements vary by jurisdiction. If you connect to your home’s plumbing system, add new water lines, or alter drains, you will often need a permit and inspection. Simpler setups that use a garden hose connection and a bucket or contained drain may not require permits in some areas. Make sure to check with your local building department or online permit lookup before you begin. When to call a plumber: if permits are required, a licensed plumber can often pull permits and ensure the installation meets code.
How do I prevent my outdoor sink from freezing in winter?
To prevent freezing, shut off the supply, open faucets to drain lines, disconnect and store hoses, and drain low points. Use an air compressor to blow out water from lines if recommended for your pipe type (follow manufacturer guidance and use low pressure). For the P-trap, either remove and store it or add a small amount of propylene-glycol based plumbing-safe antifreeze (labeled safe for potable plumbing where applicable)—do not use automotive ethylene-glycol. In very cold climates, consider frost-resistant fixtures or heat tape on exposed pipes. When to call a plumber: for hard-to-access lines or if you’re unsure about safe blow‑out procedures, hire a pro.
Can I connect my outdoor sink to a rain barrel?
Yes—connecting to a rain barrel is a sustainable water source option. You’ll usually need a pump to provide pressure and a filter if you plan to rinse produce or use the water for anything other than cleaning tools or watering plants. Rain barrel water is not potable unless properly treated; label the system clearly as non-drinking water. When to call a plumber: consult a pro if you plan to integrate the rain barrel with plumbing or install pumps and filtration to ensure safe connections and pressure protection.
Conclusion
Installing an outdoor sink is a practical, rewarding DIY project that adds real functionality to your yard, garden, patio, or outdoor kitchen. With careful planning, the right materials, and attention to drainage and local codes, you can install a durable sink—often stainless steel for long life—that makes outdoor tasks and entertaining easier while reducing trips through the house.
Remember to check local building codes and permit requirements, choose weather-resistant materials and fixtures, and design for proper drainage and winterization. Regular maintenance and seasonal care will keep the sink, faucet, and plumbing in good working order and extend the life of your installation.
Whether you want a simple hose-connected prep sink for gardening, a full-featured unit tied into your home plumbing and hot water, or a feature in an outdoor kitchen, an outdoor sink is a useful upgrade that improves convenience and workflow around your home.
Related Articles
1- How to Install a French Drain for Outdoor Sink in 11 Steps