An Outdoor Spigot Sink-7 Proven Steps to Install and Use for Gardening and Cleaning
In this comprehensive guide, we’ll walk you through everything you need to know about installing, using, and maintaining an outdoor spigot sink. We’ll also recommend some of the best products on the market to help you make an informed decision for your specific needs.
Benefits of Installing an Outdoor Spigot Sink
Gardening Convenience
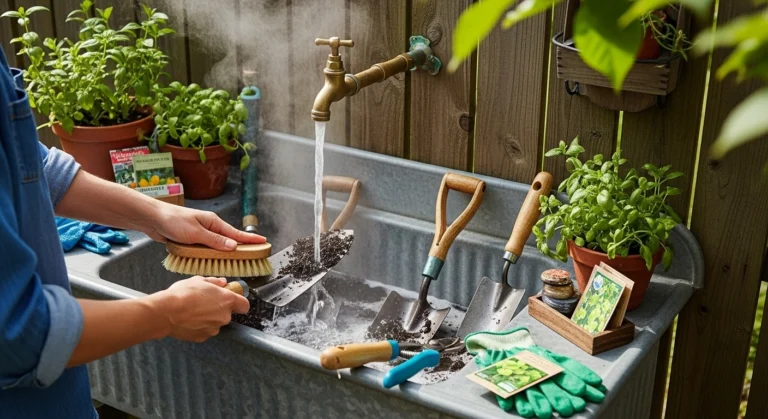
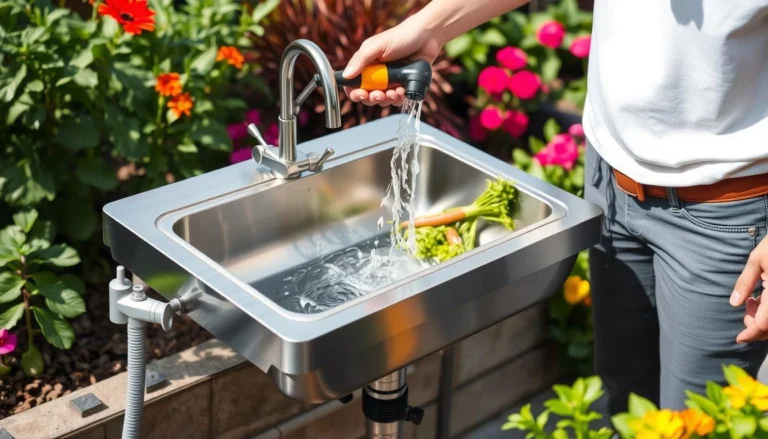
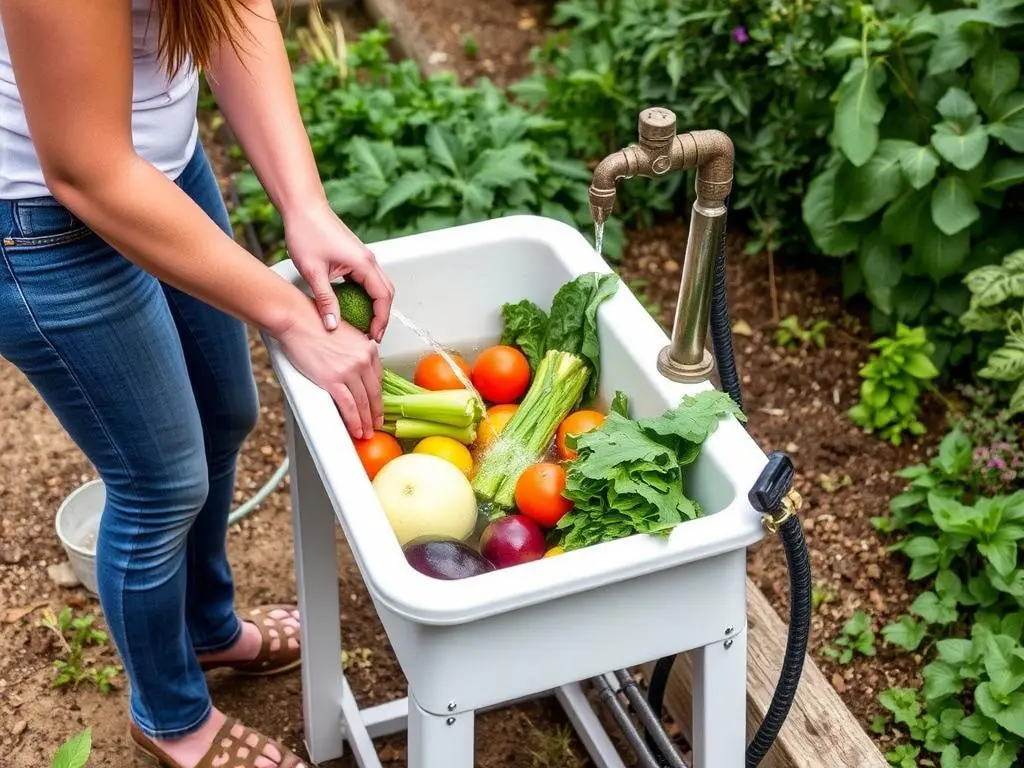
An outdoor spigot sink lets you wash vegetables right after harvesting, clean your tools before storage, and rinse off muddy gloves without tracking dirt into your home. This simple addition saves countless trips indoors and keeps your house cleaner.
Many gardeners find that having a dedicated outdoor sink encourages better tool maintenance and more thorough cleaning of produce before bringing it indoors.
Versatile Outdoor Cleaning
Beyond gardening, an outdoor sink provides a convenient station for washing pets, cleaning outdoor equipment, filling buckets for various projects, and even washing hands during backyard gatherings.
The versatility of an outdoor spigot sink makes it a practical addition to any home with outdoor activities, from gardening to DIY projects to entertaining.
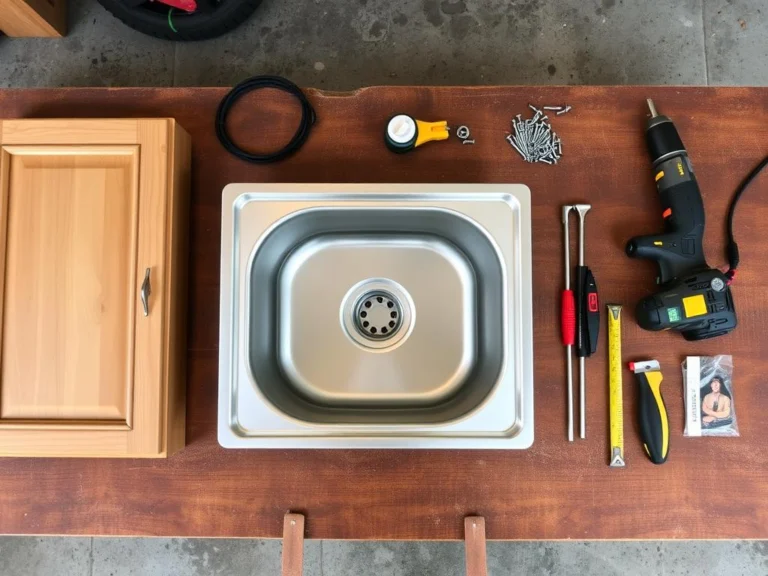
Tools and Materials Needed for Installation

Essential Tools
- Adjustable wrench (2)
- Screwdriver set (Phillips and flathead)
- Tape measure
- Level
- Drill with bits (if mounting to a structure)
- Pipe cutter (for PVC installations)
- Pliers
- Utility knife
Required Materials
- Outdoor sink basin (stainless steel recommended)
- Hose splitter/Y-connector for spigot
- Flexible water hoses (food-grade)
- Teflon tape
- Hose clamps
- PVC pipes and fittings (if creating a permanent installation)
- Mounting hardware (screws, brackets)
- Sink stand or mounting surface
- Drain hose or bucket for drainage
Step-by-Step Installation Guide
1- Choose the Perfect Location
Select a spot near your existing outdoor spigot that provides convenient access for your gardening and cleaning needs. Ensure the ground is level and stable. Consider proximity to your garden, accessibility, and drainage options.

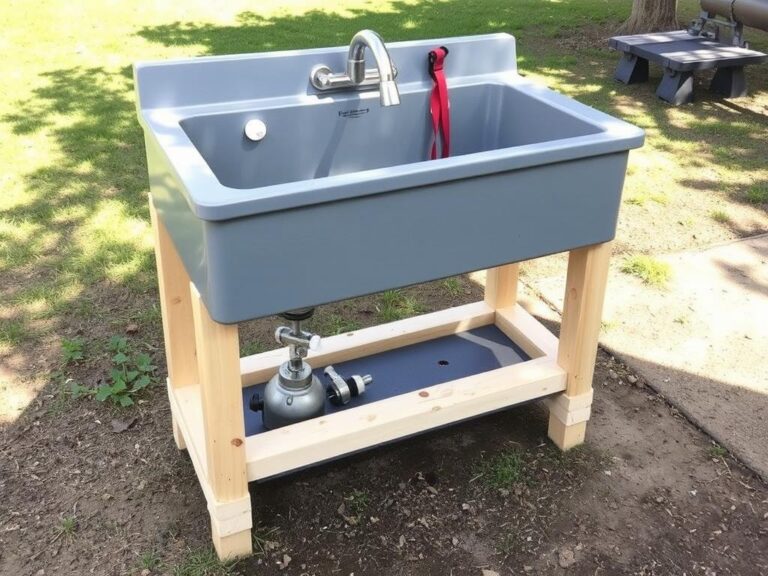
2- Prepare Your Sink Stand
If using a pre-made sink stand, assemble according to the manufacturer’s instructions. For DIY stands, ensure it’s sturdy enough to support a filled sink. The stand should be level and secured to prevent tipping when the sink is in use.

3- Install the Hose Splitter
Turn off your outdoor spigot. Wrap Teflon tape around the spigot threads (2-3 wraps clockwise). Attach the Y-connector/hose splitter and tighten with an adjustable wrench. This allows you to use both the sink and a garden hose simultaneously.

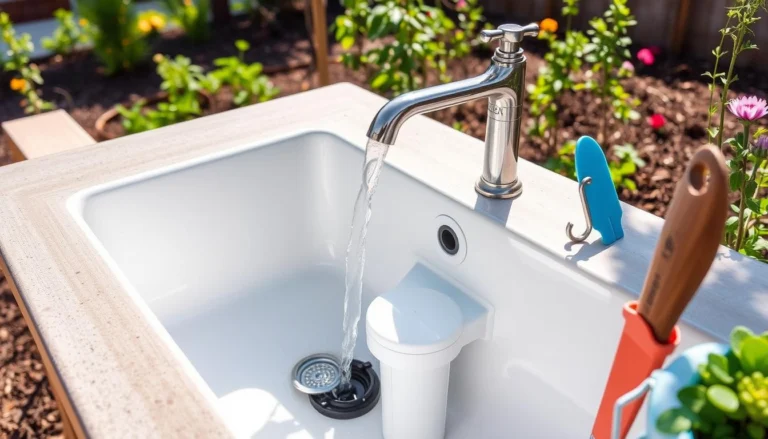
4- Mount the Sink Basin
Place the sink basin on your stand and secure it according to the mounting hardware provided. Ensure it’s level and firmly attached. For permanent installations, you may need to drill holes and use appropriate fasteners.

5- Connect Water Supply
Attach one end of your flexible hose to the splitter and the other to your sink faucet. Use Teflon tape on all threaded connections and tighten with a wrench. Ensure connections are secure but don’t overtighten, which can damage threads.

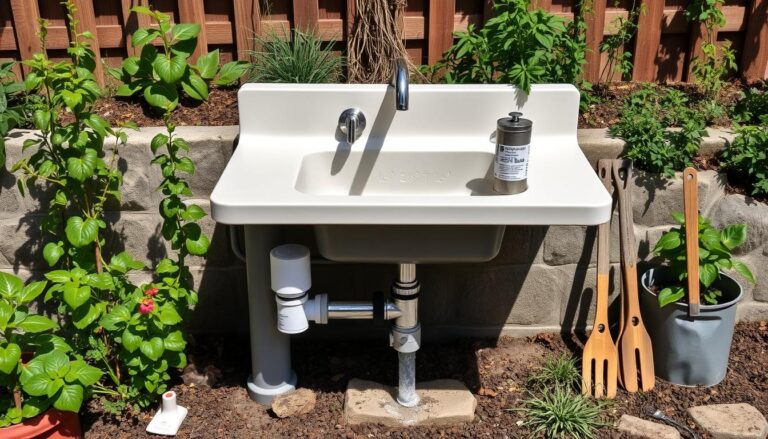
6- Set Up Drainage
Determine how water will drain from your sink. Options include: connecting a drain hose to direct water to plants or a garden area, placing a bucket under the drain to collect water for reuse, or creating a French drain system for permanent installations.

7- Test Your Installation
Turn on the water supply slowly and check all connections for leaks. Test the faucet operation and drainage system. Make any necessary adjustments to ensure proper water flow and drainage.

Safety Tip
Always turn off the water supply before making any adjustments to your outdoor spigot sink connections. Use food-grade hoses if you’ll be washing vegetables or anything that will come in contact with food.
Creative Ways to Use Your Outdoor Spigot Sink

Garden Tasks
- Washing freshly harvested vegetables
- Cleaning and sanitizing garden tools
- Mixing fertilizers and plant treatments
- Filling watering cans and sprayers
- Washing hands after gardening
Outdoor Cleaning
- Washing muddy boots and shoes
- Bathing pets outdoors
- Cleaning outdoor furniture
- Washing paintbrushes after DIY projects
- Rinsing sports equipment
Entertaining
- Hand-washing station for BBQs
- Drink preparation area
- Cleaning station for outdoor dining
- Kids’ water play activities
- Filling coolers for parties
“Installing an outdoor spigot sink was a game-changer for my gardening routine. I no longer track mud into the house, and washing vegetables right after harvesting keeps my kitchen clean. It’s such a simple addition but makes a huge difference.”
Maintenance and Winterization Tips

Regular Maintenance
- Clean the sink basin regularly with mild soap and water
- Check connections monthly for leaks or loose fittings
- Clear the drain of debris to prevent clogs
- Inspect hoses for cracks or wear and replace as needed
- Tighten any loose screws or mounting hardware
Winterization Steps
Important: In regions with freezing temperatures, proper winterization is essential to prevent damage to your outdoor spigot sink system.
- Disconnect Water Supply: Turn off the water at the spigot and disconnect all hoses. Store hoses indoors for the winter.
- Drain the System: Open the faucet to allow any remaining water to drain completely from the lines.
- Protect the Spigot: Install an insulated spigot cover over your outdoor faucet.
- Cover or Store the Sink: Either cover the sink with a weatherproof cover or, if possible, move the entire unit to a protected area like a garage or shed.
- Drain Trap Protection: Pour environmentally-friendly antifreeze into the drain trap if the sink will remain outdoors.
Pro Tip: Take photos of your connection setup before disassembling for winter. This makes spring reassembly much easier, especially if you don’t use the sink for several months.
Top 5 Outdoor Spigot Sinks Recommended for 2023
Based on durability, functionality, and user reviews, here are our top recommendations for outdoor spigot sinks that connect easily to your existing outdoor water source:
1. VINGLI Portable Folding Sink Station

Pros
- Foldable design for easy storage
- Stainless steel construction resists rust
- Includes a lower shelf for storage
- Quick connection to standard garden hoses
- Drain hose included for directing water
Cons
- Assembly required
- Not suitable for permanent outdoor installation
- The drain hose could be longer
The VINGLI Portable Folding Sink is perfect for gardeners who need a flexible solution they can move around the yard or store away during the winter months. Its stainless steel construction ensures durability, while the folding design makes it practical for those with limited space.
2. Kotulas Outdoor Garden Sink Station

Pros
- Sturdy metal frame construction
- Large sink basin for washing bigger items
- Includes towel holder and soap dish
- Garden hose adapter included
- Wire mesh shelf for storage
Cons
- Heavier than portable models
- Some assembly required
- Faucet quality could be better
The Kotulas Garden Sink Station offers a more permanent solution with its sturdy metal frame and comprehensive features. It’s ideal for gardeners who want a dedicated washing station with ample storage space and don’t need to move or store it frequently.
3. Best Choice Products Outdoor Garden Sink

Pros
- Attractive wooden frame design
- Stainless steel sink basin
- Multiple storage shelves
- Easy garden hose connection
- Includes a drainage system
Cons
- Wood requires maintenance
- More complex assembly
- May not withstand harsh winters without protection
The Best Choice Products Garden Sink combines functionality with aesthetic appeal. Its wooden construction makes it an attractive addition to garden spaces while providing all the practical benefits of an outdoor sink. The wood will require occasional treatment to maintain its appearance and durability.
| Product | Material | Price Range | Special Features | Best For |
| VINGLI Portable Folding Sink | Stainless Steel | $80-$100 | Foldable, Storage Shelf | Portability, Limited Space |
| Kotulas Garden Sink Station | Metal Frame, Plastic Basin | $120-$150 | Towel Holder, Soap Dish | Permanent Installation |
| Best Choice Products Garden Sink | Wood, Stainless Steel Basin | $150-$180 | Multiple Shelves, Aesthetic Design | Decorative Gardens |
| Outsunny Outdoor Garden Sink | Fir Wood, Metal Basin | $130-$160 | Large Work Surface, Backsplash | Potting and Garden Work |
| DIY PVC Pipe Sink | PVC, Plastic Basin | $30-$50 | Customizable, Budget-Friendly | DIY Enthusiasts, Budget Option |
Troubleshooting Common Issues

Low Water Pressure
Possible Causes:
- Kinks in the supply hose
- Clogged aerator in the faucet
- Partially closed valve
- Multiple hoses connected to one spigot
Solutions:
- Check and straighten any kinked hoses
- Remove and clean the faucet aerator
- Ensure the spigot valve is fully open
- Consider installing a higher-flow splitter
Leaking Connections
Possible Causes:
- Loose connections
- Missing or damaged washers
- Cracked fittings
- Insufficient Teflon tape
Solutions:
- Tighten all connections (but don’t overtighten)
- Replace any missing or damaged rubber washers
- Apply fresh Teflon tape to threaded connections
- Replace any cracked or damaged fittings
Drainage Problems
Possible Causes:
- Clogged drain
- Kinked drain hose
- Improper slope for drainage
- Drain hose too long
Solutions:
- Clear any debris from the drain
- Straighten the drain hose
- Adjust the sink position to ensure proper drainage slope
- Shorten the drain hose if necessary
Unstable Sink Station
Possible Causes:
- Uneven ground
- Loose assembly
- Weight imbalance
Solutions:
- Level the ground beneath the sink station
- Tighten all screws and fasteners
- Add weight to the base or secure it to a wall if possible
- Consider adding adjustable feet for uneven surfaces
DIY Budget-Friendly Outdoor Spigot Sink

If you’re on a tight budget or enjoy DIY projects, you can create a simple but functional outdoor spigot sink using PVC pipes and a plastic basin. This project typically costs $30-$50, depending on the materials used.
Materials Needed:
- 1″ PVC pipes (approximately 10 feet)
- PVC connectors (elbows, T-joints, caps)
- PVC cement
- Plastic utility sink basin
- Garden hose adapter
- Flexible hose
- Drain plug or hose
- PVC cutter or saw
- Measuring tape
- Sandpaper
You can find detailed plans and video tutorials online for various DIY outdoor sink designs. The advantage of a DIY approach is that you can customize the size, height, and features to perfectly match your needs and available space.
Transform Your Outdoor Experience with a Spigot Sink

An outdoor spigot sink is one of those simple additions that can dramatically improve your gardening and outdoor experience. By providing convenient water access exactly where you need it, you’ll save time, reduce mess, and make outdoor tasks more enjoyable.
Whether you choose a pre-made sink station or build your own DIY version, the benefits remain the same. Just remember to properly maintain your outdoor sink and winterize it in colder climates to ensure years of reliable service.
Ready to Enhance Your Outdoor Space?
Choose the outdoor spigot sink that best fits your needs and transform your gardening experience today!