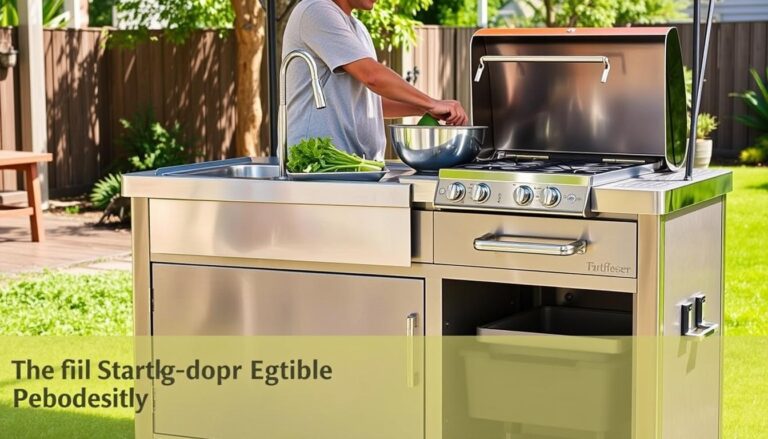
How to Prevent Outdoor Faucets from Freezing in Winter
When temperatures plummet, your unprotected outdoor faucets are on the front lines. Water trapped inside the pipe can freeze in a matter of hours, expanding with enough force to crack metal and burst the pipe. The result is a devastating and expensive flood the moment the ice thaws. Fortunately, learning how to prevent outdoor faucets from freezing is a straightforward process that every homeowner can master. This guide covers everything you need to know, from the crucial seasonal task of shutting off the water to the benefits of foam faucet covers, so you can enjoy peace of mind all winter long.
Understanding the Risks of Frozen Outdoor Faucets
It’s important to know the risks of frozen outdoor faucets to avoid expensive fixes. Frozen faucets can cause small problems or big damage to your plumbing system.
Why Pipes Freeze in Winter
Outdoor faucets freeze easily because they face cold weather. When water inside freezes, it expands. This can burst the pipes.
The Science Behind Pipe Freezing
Water freezes at 32°F (0°C). But, freezing risk also depends on the faucet’s design and insulation. The temperature’s length matters too.
Temperature Thresholds for Freezing Risk
Pipes can freeze when it’s below 20°F (-7°C) for a while. Proper insulation and protective measures help prevent this.
Potential Damage from Frozen Faucets
Frozen faucets can cause burst pipes and water damage. This can lead to expensive repairs and plumbing issues.
Burst Pipes and Water Damage
A burst pipe can spill a lot of water. This can harm walls, floors, and your stuff. Quick action is key to reduce damage.
Repair Costs and Insurance Considerations
Fixing burst pipes and water damage can cost a lot. Homeowners should check their insurance to see what’s covered.
Common Vulnerable Points in Your Plumbing System
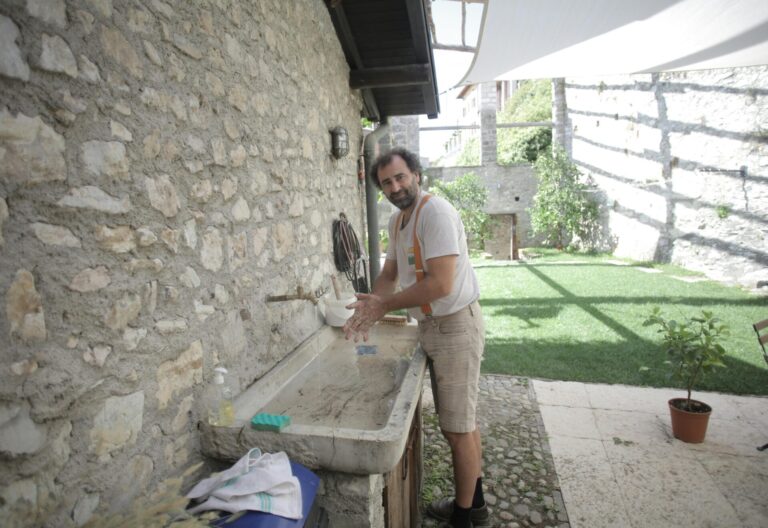
Outdoor faucets are often at risk. Also, pipes in unheated spots like garages or basements are vulnerable.

How Can I Prevent My Outdoor Faucets from Freezing in Winter?
Winterizing your outdoor faucets is easy and effective. It’s all about knowing the basics and doing it on time.
Basic Prevention Principles
To stop outdoor faucets from freezing, follow a few simple steps. First, drain the lines before the first freeze. This is the simplest and cheapest way. You can also insulate exposed pipes and use frost-free faucets or covers.
When to Start Winterizing Your Faucets
The timing of winterizing depends on where you live. In colder areas, start early.
Regional Timing Considerations Across the US
- In northern states, start winterizing in late fall.
- In southern states, you might wait until early winter.
Weather Forecasting and Freeze Alerts
Watch the weather and sign up for freeze alerts. This helps you know when to act.
Tools and Materials You’ll Need
To winterize your faucets well, you need the right tools and materials.
Essential Supplies Checklist
- Faucet covers or insulation materials
- Pipe insulation
- Heat tape or thermostatically controlled heat cables
- Shut-off valve wrench

By following these tips and using the right materials, you can keep your outdoor faucets from freezing. This saves you from expensive repairs.
Types of Outdoor Faucets and Their Specific Needs
An outdoor faucet, commonly known as a hose bib, sillcock, or spigot, is an essential plumbing fixture that provides water access to the exterior of a home. While seemingly simple, choosing the right type is crucial for convenience, functionality, and, most importantly, protecting your home from water damage due to freezing temperatures. Understanding the different types and their specific requirements will ensure you select the best faucet for your climate and needs.
1. Standard Hose Bib (or Threaded Faucet)
This is the most traditional and commonly recognized outdoor faucet.
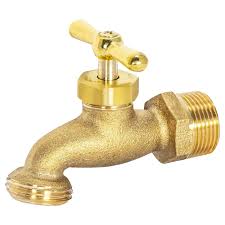
Description: Features a threaded spout to which a garden hose can be attached. It is typically controlled by a simple handle that turns clockwise to close and counter-clockwise to open. The valve seat is located inside the faucet body.
Specific Needs & Considerations:
Freeze Protection: This is its biggest weakness. In standard models, the water valve is located inside the faucet body, which is outside the insulated part of the house. When temperatures drop, any water left inside can freeze, expand, and cause the pipe or faucet to burst.
Manual Draining: In freezing climates, it is critical to shut off the water supply to the bib from inside the house and open the outdoor faucet to drain all water before winter.
Durability: Often made of brass or chrome-plated brass, but cheaper models can be made of plastic, which is more prone to cracking.
Best For: Warmer climates that rarely experience freezing temperatures, or for users who are diligent about seasonal shut-off and draining.
2. Frost-Free Hose Bib (or Freezeless Sillcock)
This is the modern standard for homes in regions that experience winter, designed specifically to prevent freezing.
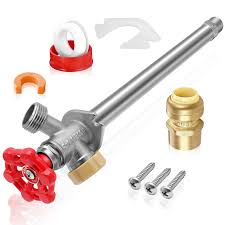
Description: The key difference is the long, extended stem. The actual shut-off valve is not in the outdoor spout but is located further back, inside the warmth of the house’s wall. When you turn the handle off, it not only stops the water flow but also opens a drain port inside the wall cavity, allowing any residual water in the outdoor pipe section to drain out.
Specific Needs & Installation Requirements:
Correct Installation Angle: It must be installed with a slight downward pitch toward the outside. This ensures that water drains out and away from the house, not back into the wall.
Proper Stem Length: The “frost-free” stem must be long enough to actually reach past the exterior wall and into the insulated cavity. Common lengths are 4″, 6″, 8″, and 12″. Measuring your wall depth is essential.
Hose Removal: You must disconnect the garden hose after each use. If a hose is left attached, water can be trapped in the spout, defeating the frost-free mechanism and leading to a freeze.
No Leaky Hose: A hose left connected with its spray nozzle shut off can also create a closed system, preventing drainage and causing a burst pipe.
Best For: Virtually all homes in climates with seasonal freezing. It is a critical upgrade for winterization.
3. Yard Hydrant
Common in agricultural or rural settings, but also useful for large properties, paddocks, or distant garden beds.
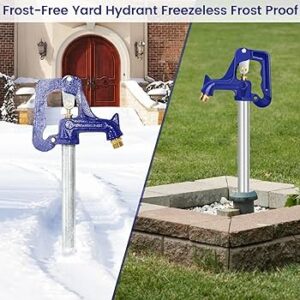
Description: This is a heavy-duty faucet mounted on a pipe that extends deep into the ground. It operates with a long handle that opens and closes a plunger valve located well below the frost line.
Specific Needs & Installation Requirements:
Deep Burial: The base of the hydrant and its valve mechanism must be installed below the local frost line (often 3-4 feet deep or more). This ensures the operating parts are never exposed to freezing temperatures.
Drainage Mechanism: When shut off, the hydrant automatically opens a drain port at its base, allowing all water in the above-ground pipe to drain down into a gravel or rock pit surrounding the base of the hydrant underground.
Maintenance: The packing nut may occasionally need tightening to prevent leaks around the handle shaft.
Best For: Farms, ranches, large properties, and areas where water is needed far from the main building.
4. Anti-Siphon / Vacuum Breaker Faucets
This is not always a separate type of faucet but a critical safety feature that can be built-in or added as an attachment.
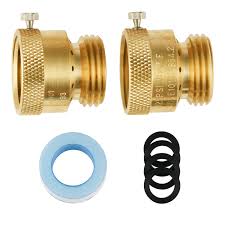
Description: An anti-siphon device is a one-way valve that prevents contaminated water from being sucked back into your home’s clean drinking water supply. This can happen if there is a sudden drop in mains water pressure (e.g., a fire hydrant being used nearby) while your hose is submerged in a pool, bucket of fertilizer, or lying in a muddy puddle.
Specific Needs & Considerations:
Code Compliance: Most modern plumbing codes require outdoor faucets to have a built-in or attached anti-siphon device.
Built-in vs. Add-on: Most frost-free sillcocks have a built-in anti-siphon valve. For standard hose bibs, you must screw a separate vacuum breaker onto the threaded spout.
Winter Removal: If you use an add-on vacuum breaker, it must be removed before winter to allow the frost-free sillcock to drain properly.
Best For: Every single outdoor faucet that will have a hose attached to it. It is a non-negotiable feature for protecting potable water.
5. Specialty and Decorative Faucets
These focus on aesthetics or specific functionalities beyond basic water delivery.
Description:
Wall-Mounted Faucets with Cross Handles: Offer a more traditional or vintage look.
Pot-Filler Faucets (Outdoor): Long, articulated arms used near outdoor kitchens to fill large pots on a grill or range.
Double Hose Bibs: A single unit with two separate spouts, allowing two hoses to be connected without a splitter.
Specific Needs:
Aesthetic Cohesion: The primary need is to match the architectural style or outdoor kitchen design.
Functionality: Pot-fillers need to be placed at the correct height and reach. Double bibs must be plumbed with adequate water pressure for both outlets.
Freeze Protection: Even decorative faucets in freezing climates must be frost-free or be part of a system that is properly winterized.
Irrigation System Connections
Irrigation system connections are vital for lawns and gardens. They must be winterized by draining the system to avoid pipe bursts. Using compressed air to clear pipes is common.
| Type of Faucet | Winterization Needs |
|---|---|
| Standard Hose Bibs | Disconnect and drain hoses, use frost-proof covers |
| Frost-Free Sillcocks | Ensure proper insulation, use faucet covers |
| Yard Hydrants | Check and maintain the drainage mechanism |
| Irrigation System Connections | Drain irrigation system use compressed air to blow out water |
Experts say, “Winterizing outdoor faucets is not just a task, it’s essential to avoid expensive damage.” Knowing your faucets’ needs helps protect them in winter.
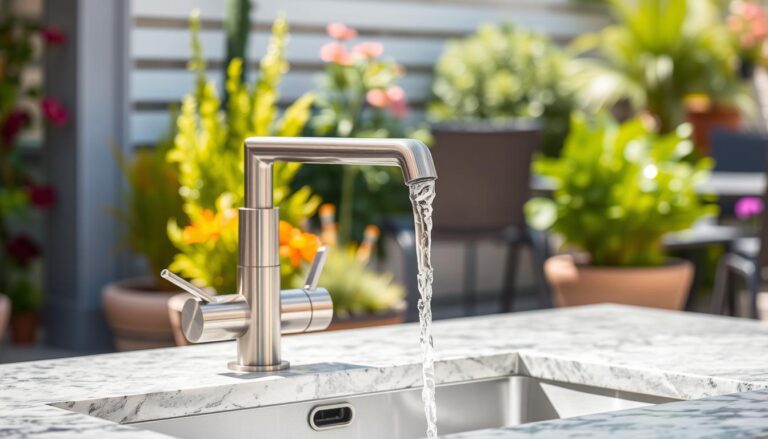
Shutting Off Water Supply to Outdoor Faucets
Shutting off the water supply is a key step to protect your outdoor faucets from freezing. This simple action can prevent major damage to your plumbing.
Locating Your Water Shut-Off Valves
The first step is to find the shut-off valves for your outdoor faucets. These valves are usually in your basement or crawlspace.
Common Locations in Different Home Styles
In homes with basements, the valves are near the water main or where lines enter the house. Without a basement, they might be in a crawlspace or near an exterior wall.
Step-by-Step Process for Shutting Off Water
Once you find the shut-off valve, follow these steps:
- Turn the valve clockwise to shut off the water supply.
- Open the outdoor faucet to drain the water from the line.
Using Shut-Off Valves Properly
Make sure the shut-off valves work right. If a valve is stuck, get it serviced or replaced.
Draining Remaining Water from the Lines
After shutting off the water, drain the lines to prevent freezing.
Gravity Draining Techniques
Use gravity to drain the lines. Just open the outdoor faucet and let the water drain.
Using Air Pressure to Clear Lines
For better draining, use compressed air. This works well for irrigation systems.
| Draining Method | Effectiveness | Complexity |
|---|---|---|
| Gravity Draining | Moderate | Low |
| Air Pressure | High | Moderate |

By following these steps and choosing the right draining method, you can shut off the water supply to your outdoor faucets. This protects them from freezing temperatures.
Installing Frost-Free Faucets: A Long-Term Solution
Installing frost-free faucets is a smart long-term plan to avoid frozen outdoor faucets. These faucets shut off the water supply inside your home. This keeps the water from freezing.
What Are Frost-Free Faucets?
Frost-free faucets, also known as freeze-proof faucets, are made to handle cold weather. They have the valve seat inside your home. This stops water from freezing in the faucet.
How They Work to Prevent Freezing
Frost-free faucets have a longer stem that keeps the valve seat inside. When you turn off the faucet, water drains out. This stops the faucet from freezing.
Benefits of Frost-Free Faucet Installation
Installing frost-free faucets has many benefits. It reduces the risk of pipes freezing. It also means less maintenance and could save you money on repairs.
| Benefits | Description |
|---|---|
| Reduced Risk | Less chance of pipes freezing because of the faucet’s design. |
| Less Maintenance | Frost-free faucets need less upkeep because they’re less likely to freeze. |
| Cost Savings | Could save money on repairs for frozen pipes. |
Professional vs. DIY Installation
Homeowners can choose to hire a pro or do it themselves. It depends on their plumbing skills and experience.
Cost Comparison
Hiring a pro costs between $100 to $300 per faucet. This includes labor and materials. Doing it yourself can save on labor but you’ll need to buy the right tools and materials.
Required Skills and Tools
For a DIY job, you need basic plumbing skills. You’ll also need a wrench, pliers, and possibly a pipe cutter and solder for any pipe work.

Using Insulated Faucet Covers
Insulated faucet covers are a simple yet effective solution for protecting your outdoor faucets from freezing temperatures. These covers fit snugly over your faucet. They provide insulation to keep the faucet and its pipes from freezing.
Types of Faucet Covers Available
Outdoor faucet covers come in various materials, each with its own benefits. The most common types include foam covers and fabric-insulated options.
Foam Covers vs. Fabric Insulated Options
Foam covers are made from Styrofoam and fit tightly over the faucet. They are easy to install and provide excellent insulation. Fabric-insulated covers, on the other hand, are wrapped in waterproof fabric. They are also effective and can be more durable than foam covers.
| Type of Cover | Material | Durability | Ease of Installation |
|---|---|---|---|
| Foam Covers | Styrofoam | Moderate | Easy |
| Fabric Insulated Covers | Insulating material with waterproof fabric | High | Moderate |
How to Properly Install a Faucet Cover
Installing a faucet cover is easy. First, turn off the faucet and remove any hoses. Then, place the cover over the faucet, ensuring a snug fit.
Ensuring a Proper Seal
To maximize the cover’s effectiveness, ensure a proper seal. Choose a cover that fits well and adjust it as needed.
DIY Alternatives to Store-Bought Covers
If you don’t have a faucet cover, there are DIY alternatives. You can use old towels, rags, or foam pipe insulation to create a makeshift cover.
Household Materials That Work in a Pinch
Wrapping your faucet with materials like old towels or foam insulation can offer some protection. While not as effective as a dedicated faucet cover, these DIY solutions can be a temporary fix until you get a proper cover.
Insulating Exposed Pipes
To protect your plumbing, insulate any exposed pipes, like those near outdoor faucets. This keeps the pipes at a stable temperature. It lowers the chance of freezing and damage.
Types of Pipe Insulation Materials
Many materials can insulate exposed pipes. You can choose from foam tubes, fiberglass, or heat tape. Each has its own benefits.
Foam Tubes vs. Fiberglass vs. Heat Tape
| Material | Description | Benefits |
|---|---|---|
| Foam Tubes | Pre-slit foam tubes that fit around pipes | Easy to install, cost-effective |
| Fiberglass | Woven fiberglass wrapped around pipes | High thermal insulation, durable |
| Heat Tape | Electric heating elements wrapped around pipes | Active heating, can be thermostatically controlled |
Step-by-Step Guide to Insulating Pipes
Insulating your pipes is easy with basic DIY skills.
Measuring and Cutting Insulation
Start by measuring your pipes’ length and diameter. This will tell you how much insulation you need. Cut it to size with a sharp knife or scissors, depending on the material.
Securing Insulation Properly
Wrap the insulation around the pipes snugly. Use tape or the recommended fastening method to secure it. For foam tubes, seal the edges with caulk for extra protection.
Special Considerations for Different Pipe Materials
Different pipes need different insulation.
Copper, PVC, and PEX Requirements
Copper pipes lose heat quickly, so they need extra insulation. PVC pipes freeze easily, so insulation is key. PEX pipes are flexible and less likely to freeze, but they also need insulation for best protection.
Heat Tape and Heating Cables: Installation Guide
Installing heat tape or heating cables helps protect your plumbing from freezing. It’s great for pipes in cold spots like garages, basements, or crawlspaces.
How Heat Tape Works
Heat tape, or heat cable, is a flexible cable that heats up when plugged in. It wraps around pipes to keep them warm and stop water from freezing.
Installation Process for Heat Tape
Here’s how to install heat tape:
- Find the pipes that need protection.
- Measure the pipes to figure out how much heat tape you need.
- Wrap the heat tape around the pipe as instructed by the manufacturer.
- Use electrical tape or other fasteners to keep it in place.
Wrapping Techniques for Different Pipe Configurations
Each pipe setup might need a special wrapping method. For example, pipes with fittings or valves might need extra heat tape.
Connecting to Power Sources Safely
When hooking up heat tape to power, follow these safety tips:
“Always use a GFCI-protected outlet to minimize the risk of electrical shock.”
Safety Considerations When Using Heating Elements
Using heat tape or heating cables safely is key. Here are some things to keep in mind:
| Safety Measure | Description |
|---|---|
| Fire Prevention | Keep heat tape away from flammable materials. |
| Energy Consumption | Watch your energy use to avoid high bills. |
Fire Prevention Measures
To avoid fires, make sure heat tape is installed right. Keep it away from things that can catch fire.
Energy Consumption Management
Controlling energy use saves money and is good for the planet. Use thermostatically controlled heat tapes that only turn on when needed.
Emergency Measures for Already Frozen Faucets
A frozen faucet is more than just a hassle; it can cause big plumbing problems if not fixed right away. If you see a frozen faucet, you must act fast to avoid damage.
Identifying a Frozen Faucet
Spotting a frozen faucet is the first step to fixing it. Watch for:
- No water or less water coming out
- Ice or frost on the faucet or nearby pipes
- Strange sounds or leaks near the faucet
Warning Signs to Watch For
Watch out for signs of a bigger problem, like water leaking from the faucet or around it. This could mean a burst pipe.
Safe Thawing Techniques
To thaw a frozen faucet safely, use a hair dryer or warm towels. Don’t use open flames or high-temperature tools, as they can harm the pipes or start a fire.
Using Heat Sources Properly
When using a hair dryer, start at the faucet and move back along the pipe. Keep the dryer moving to avoid overheating one spot.
What NOT to Do When Thawing
Never use a blowtorch or open flame to thaw pipes, as it can damage them or start a fire. Also, stay away from using electrical appliances near water to avoid getting shocked.
When to Call a Professional Plumber
If you’re not sure how to thaw a frozen faucet or if it doesn’t work, call a professional plumber.
Signs of Serious Damage
Look for signs of serious damage, like big leaks or water damage. If you see these, call a plumber right away to stop more problems.
Seasonal Maintenance Schedule for Outdoor Plumbing
Seasonal changes mean we need to act fast to keep outdoor plumbing in check. Making sure your outdoor faucets and pipes are ready for winter can prevent expensive fixes and water damage.
Fall Preparation Tasks
As fall comes, it’s time to get your outdoor plumbing ready for winter. This includes a few important steps:
Pre-Winter Checklist
- Disconnect and drain hoses from outdoor faucets.
- Inspect faucets for any signs of leaks or damage.
- Consider installing frost-proof faucets if you live in an extremely cold area.
Mid-Winter Check-ups
During the cold weather, it’s vital to check your outdoor plumbing for freezing or damage.
What to Inspect During Cold Snaps
- Check exposed pipes for signs of freezing.
- Ensure that faucet covers are securely in place.
- Monitor water pressure; a drop could indicate a frozen pipe.
Spring Reactivation Process
When winter ends, it’s time to get your outdoor plumbing system working again.
Safely Turning Water Back On
Turn on the water supply slowly to check for leaks.
Checking for Winter Damage
Look over your outdoor faucets and pipes for any winter damage.
| Season | Task | Frequency |
|---|---|---|
| Fall | Drain hoses, inspect faucets | Once |
| Winter | Check for freezing, ensure faucet covers are secure | Regularly during cold snaps |
| Spring | Reactivate water supply, inspect for damage | Once |
Conclusion:
To keep your home safe from winter plumbing problems, you need to act early. Knowing the dangers of frozen outdoor faucets is key. Taking steps to stop them can save you time and money.
Shutting off the water supply and insulating pipes are good starts. Using frost-free faucets or covers is also smart.
Don’t forget about regular maintenance. A seasonal maintenance plan for your outdoor plumbing is vital. It includes tasks for fall, mid-winter, and spring.
By following these tips and staying alert, you can protect your home from winter plumbing troubles. Keeping your plumbing safe from freezing is critical. It helps avoid expensive repairs and keeps your home safe and working well all winter.
FAQ
What happens if I don’t winterize my outdoor faucets?
Not winterizing your outdoor faucets can lead to freezing. This can cause pipes to burst. You might face costly water damage and expensive repairs.
How do I know if my outdoor faucet is frozen?
Check if your outdoor faucet is frozen by turning on the water supply. If no water comes out, or if it leaks, it’s likely frozen.
What is the best way to prevent outdoor faucets from freezing?
To prevent freezing, shut off the water supply. Drain the lines and insulate the faucets and pipes.
Can I use heat tape on my outdoor faucets to prevent freezing?
Yes, heat tape can help prevent freezing. But, make sure to install it correctly and use it safely to avoid hazards.
What are frost-free faucets, and are they worth installing?
Frost-free faucets shut off the water supply inside your house. They’re a good investment for cold climates.
How do I insulate exposed pipes to prevent freezing?
Use foam pipe insulation, fiberglass, or wrap pipes with heat tape. Make sure to cover all exposed areas.
When should I start winterizing my outdoor faucets?
Start winterizing in late fall before the first frost. This prevents damage from freezing temperatures.
Can I winterize my outdoor faucets myself, or do I need a professional?
You can do simple tasks like shutting off the water supply yourself. But, installing frost-free faucets might need a professional plumber.
How often should I check my outdoor faucets during winter?
Check your outdoor faucets regularly during winter. This is important after extreme cold snaps to prevent freezing or leaks.
What should I do if I’ve already noticed a frozen faucet?
If you see a frozen faucet, turn off the water supply right away. Try to thaw it safely. If unsure, call a professional plumber.
Are there any additional measures I can take to protect my outdoor plumbing?
Yes, consider installing freeze-proof faucets and using insulated covers. Regular maintenance also helps protect your outdoor plumbing.
How do I reactivate my outdoor faucets in the spring?
To reactivate your outdoor faucets in spring, turn on the water supply. Check for leaks or damage that might have occurred during winter.
Related Articles
1- How to Connect an Outdoor Sink to a Water Supply in 5 Easy Steps
2- Outdoor Sink With Hose Attachment
3- How to Prevent an Outdoor Sink from Freezing- 8 simple steps