Installing an Outdoor Sink Filtration System in 2026
Benefits of Installing an Outdoor Sink Filtration System
Installing an outdoor sink filtration system offers numerous benefits to homeowners seeking clean, safe, and convenient water access in their outdoor spaces. Whether you use your outdoor sink for cooking, gardening, or washing tools, a filtration system significantly improves performance and hygiene. The following are the key benefits of installing an outdoor sink filtration system in 2026.
1- Improved Water Quality
- Removes sediment, dirt, and debris from your water supply.
- Filters out harmful contaminants, including chlorine, bacteria, and heavy metals.
- Provides safer water for cooking, washing, and pet care
- Reduces unpleasant odors and taste caused by unfiltered water.
2- Extended Sink & Plumbing Life
- Prevents the buildup of minerals and scale inside the pipes
- Protects the sink fixtures from corrosion and staining
- Helps to maintain water pressure by keeping lines clean
- Reduces long-term repair or replacement costs.
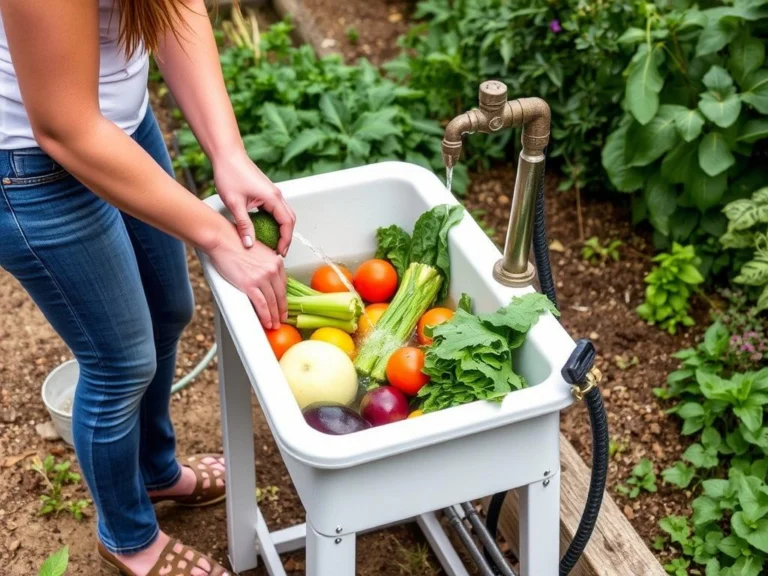
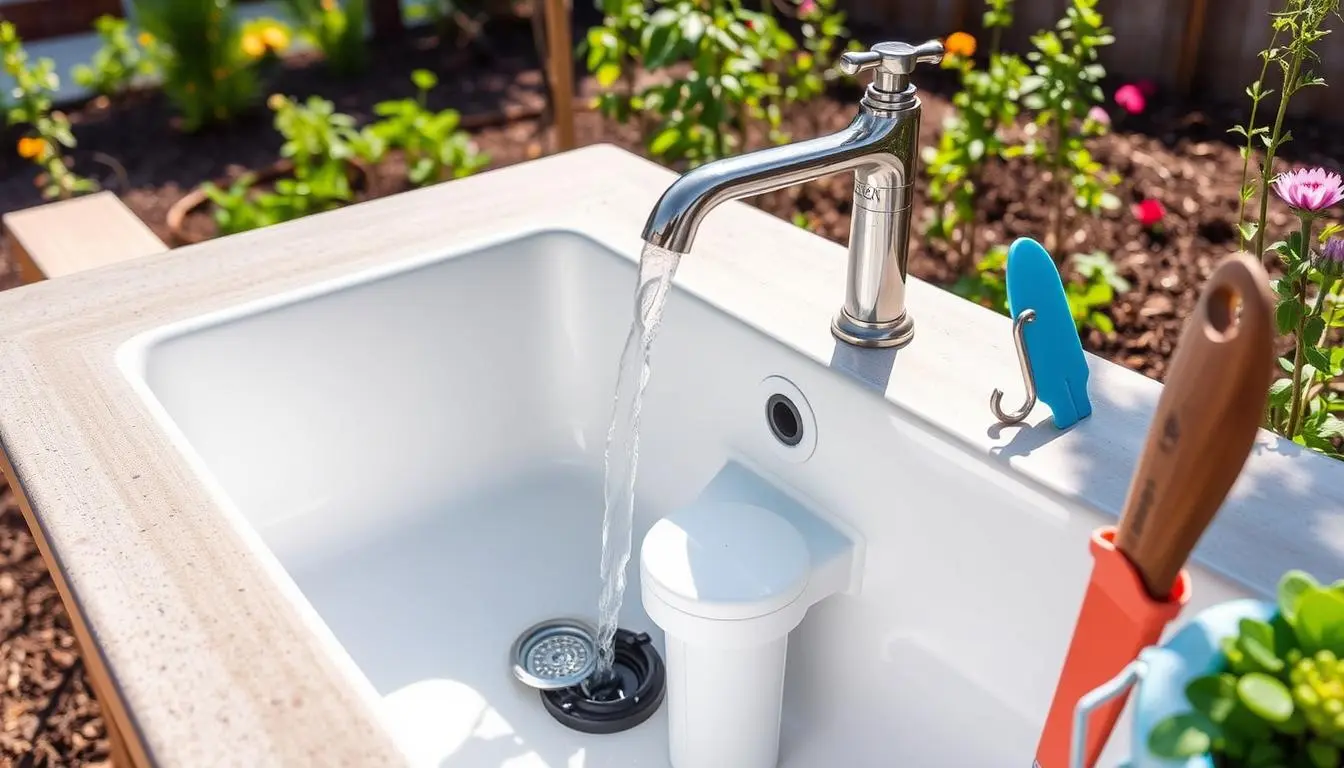
3- Better Outdoor Convenience
- Makes outdoor cooking and cleaning more efficient.
- Provides cleaner water for gardening tasks and plant care.
- Makes tool-washing safer without damaging equipment.
- Supports outdoor entertaining with a reliable water source.
4- Increased Home Value
- Adds a modern look to your outdoor kitchen setup.
- Improves the overall performance of your outdoor living space.
- Attracts buyers seeking eco-friendly, practical features.
- Demonstrates long-term planning and home maintenance.

Types of Outdoor Sink Filtration Systems
Choosing the right outdoor sink filtration system depends on your water quality, usage needs, and the level of purification you want. Below are the main types of systems that work best for outdoor kitchens, garden sinks, and utility wash stations.
1. Carbon-Based Outdoor Sink Filtration System
Carbon filters are popular for outdoor sinks because they improve taste and remove common impurities.
Key Benefits:
- Removes chlorine, odors, and bad taste.
- Ideal for light to moderate water purification.
- Easy to install and maintain.
- Budget-friendly option for outdoor kitchens.
2. Sediment Outdoor Sink Filtration System
This system targets physical impurities like sand, dust, rust, and soil particles.
Best For:
- Homes with older plumbing.
- Outdoor areas with high dirt exposure.
- Pre-filtration before advanced systems.
Advantages:
- Protects pipes and faucets.
- Keeps water clean for washing tools, hands, and garden produce.
3. Reverse Osmosis Outdoor Sink Filtration System
A high-performance choice for homeowners who want maximum water purity.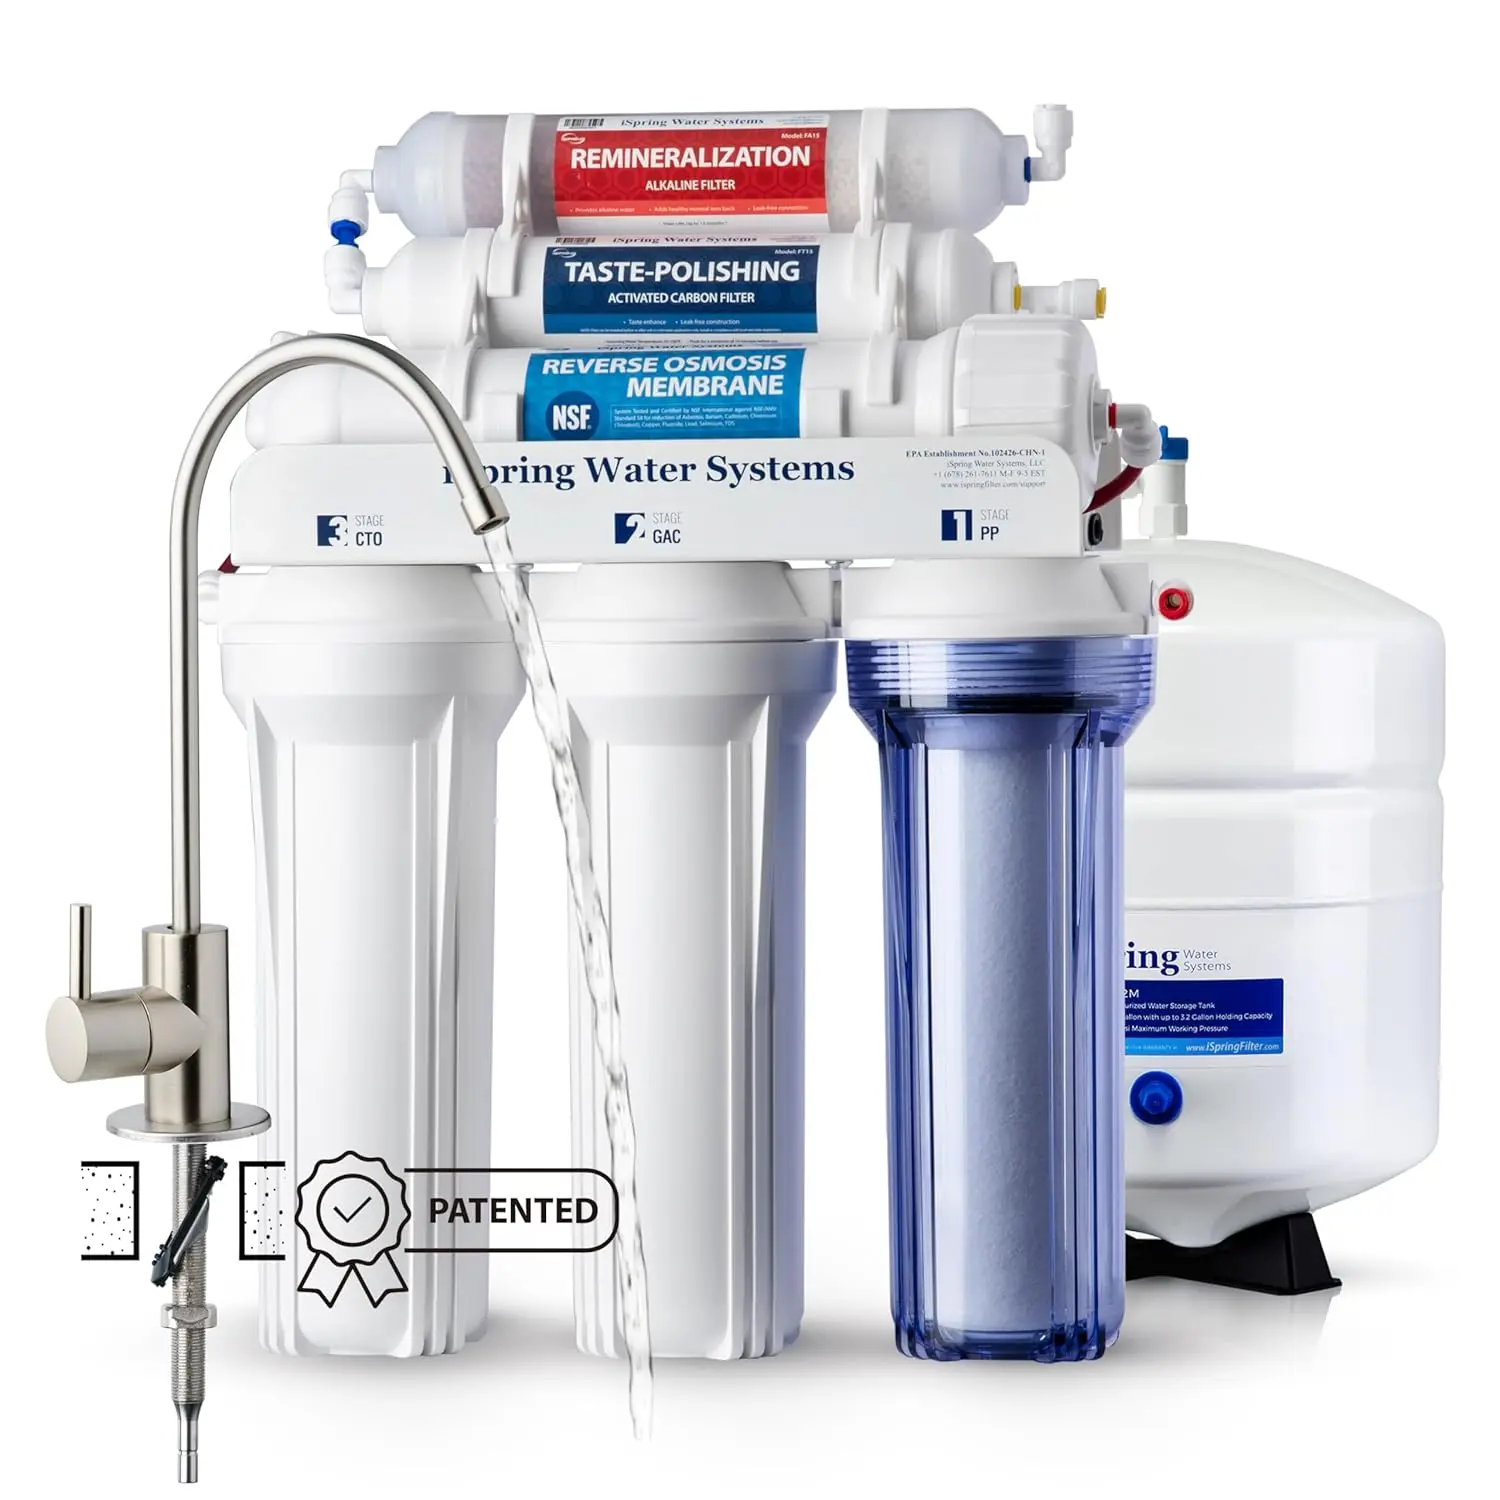
Why Choose RO:
- Removes up to 99% of contaminants.
- Suitable for cooking and pet care; ideal for outdoor sinks.
- Provides clean, safe, drinking-level water.
Considerations:
- Requires more space.
- Higher upfront cost.
- Needs occasional membrane replacement.
Buy from Amazon
4. UV Outdoor Sink Filtration System
UV systems disinfect water using ultraviolet light without chemicals.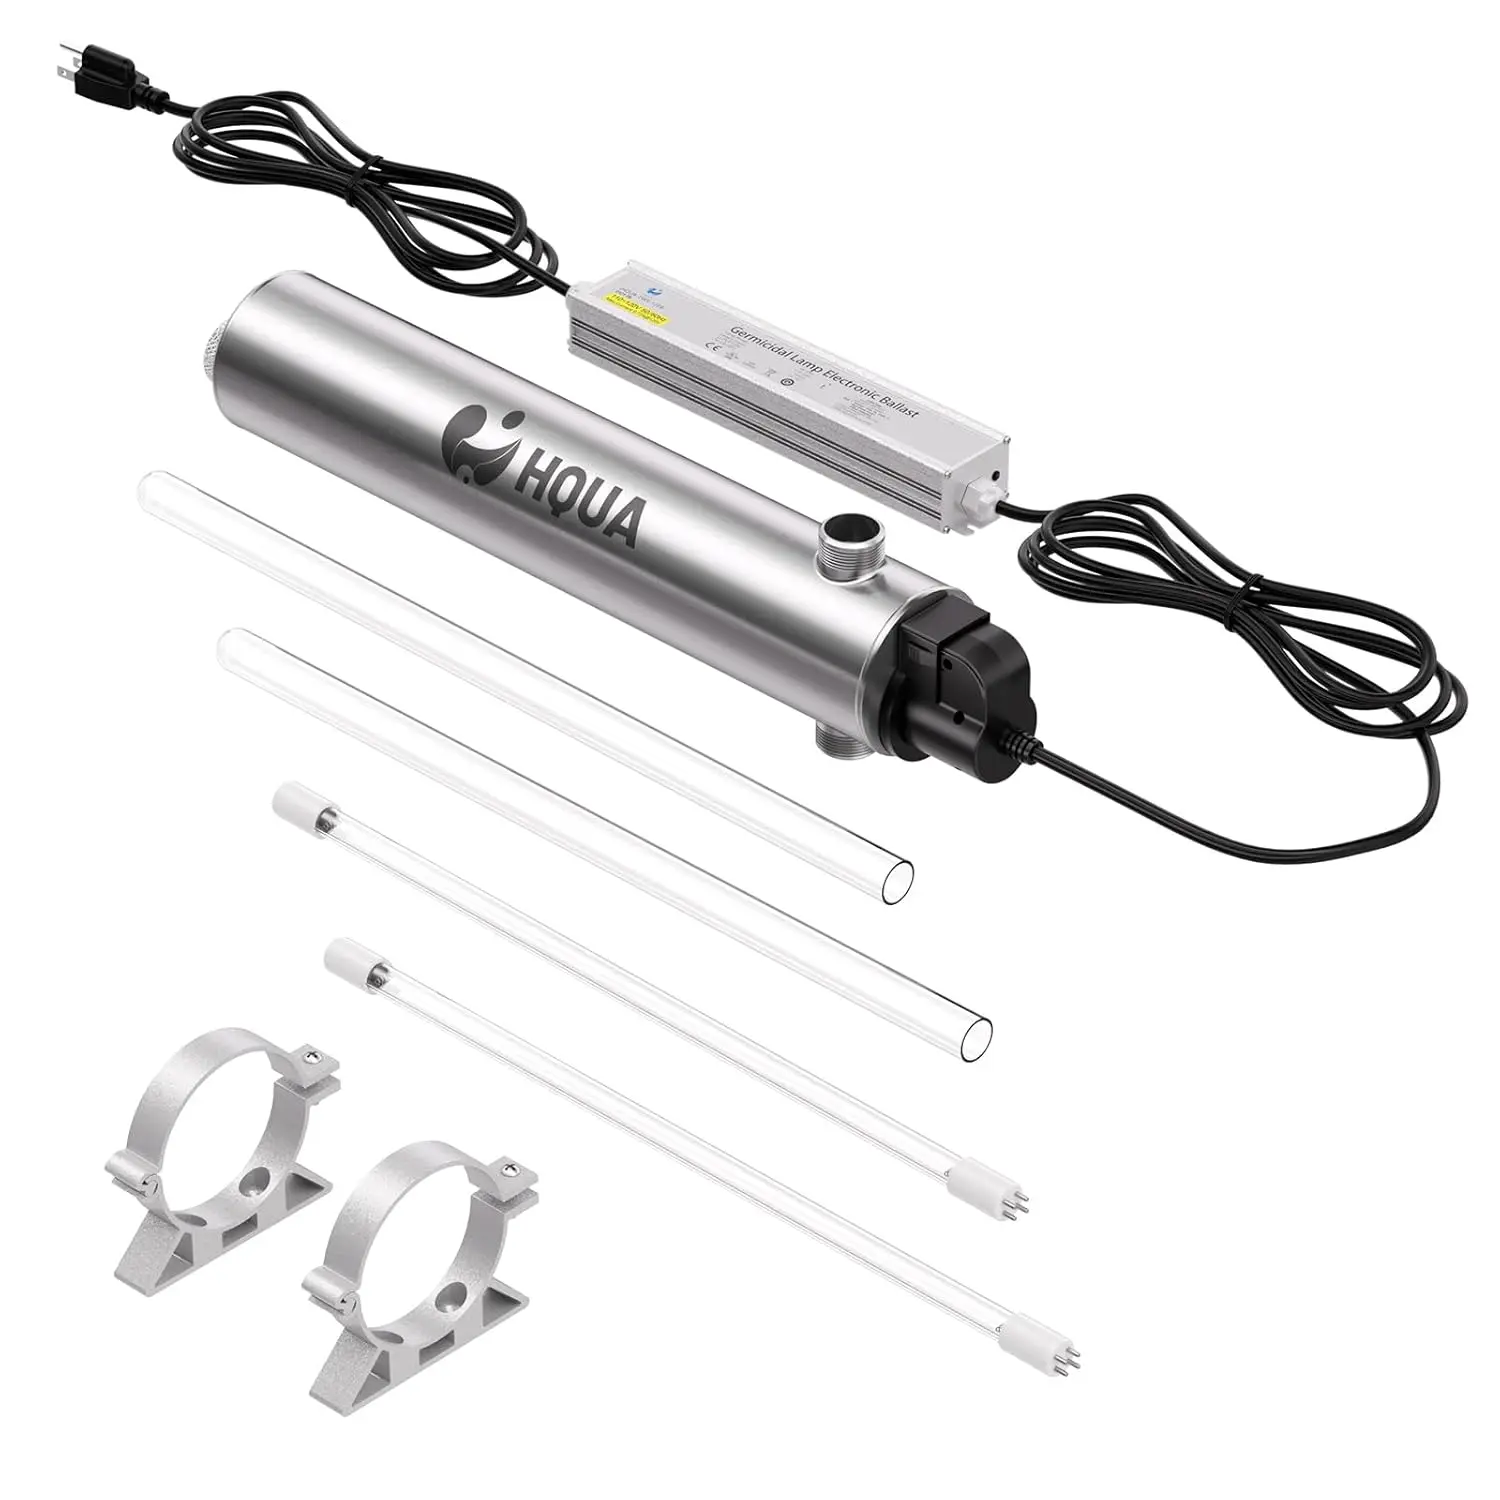
Ideal For:
- Killing bacteria, viruses, and microorganisms
- Outdoor sinks used for food prep or kids’ washing stations
Pros:
- Eco-friendly filtration
- No change in water taste
- Works well with other filtration systems
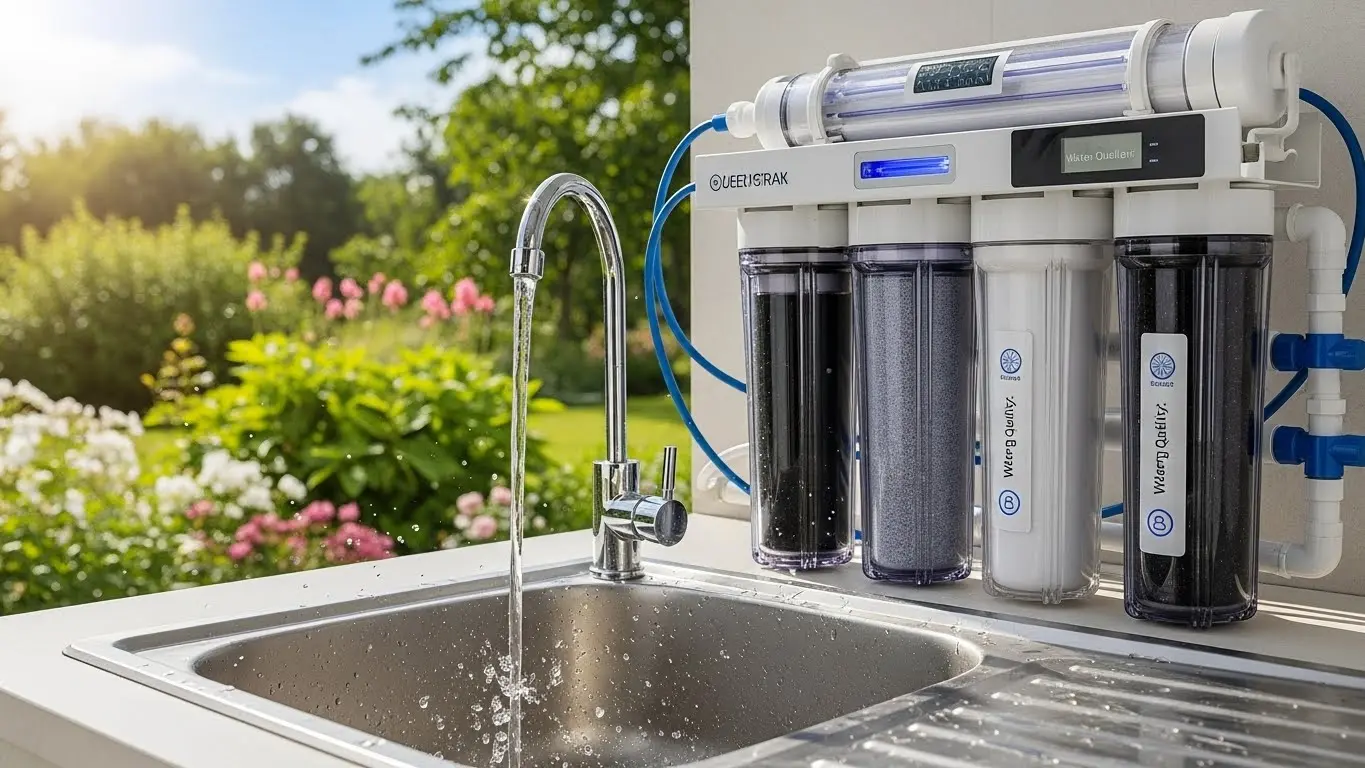
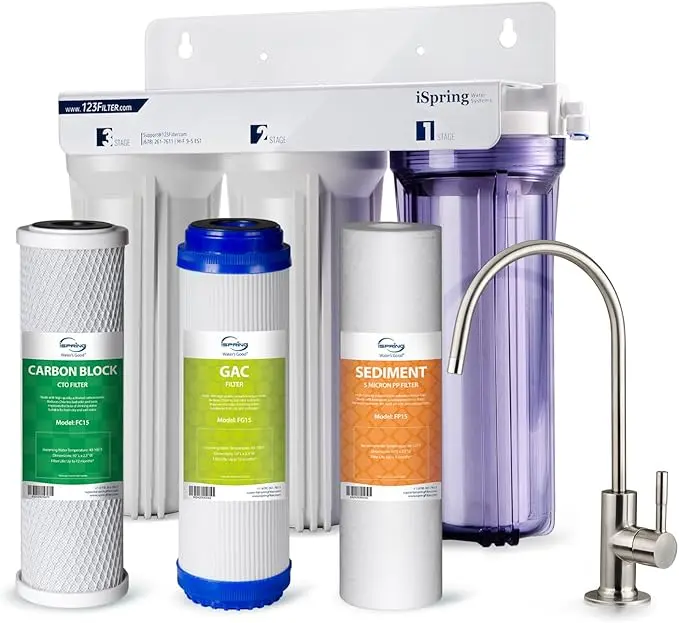
5. Multi-Stage Outdoor Sink Filtration System
This is the most advanced option, combining sediment, carbon, and UV or RO filters.
Benefits:
- Comprehensive water purification.
- Perfect for outdoor kitchens with high usage.
- Long-term reliable performance.
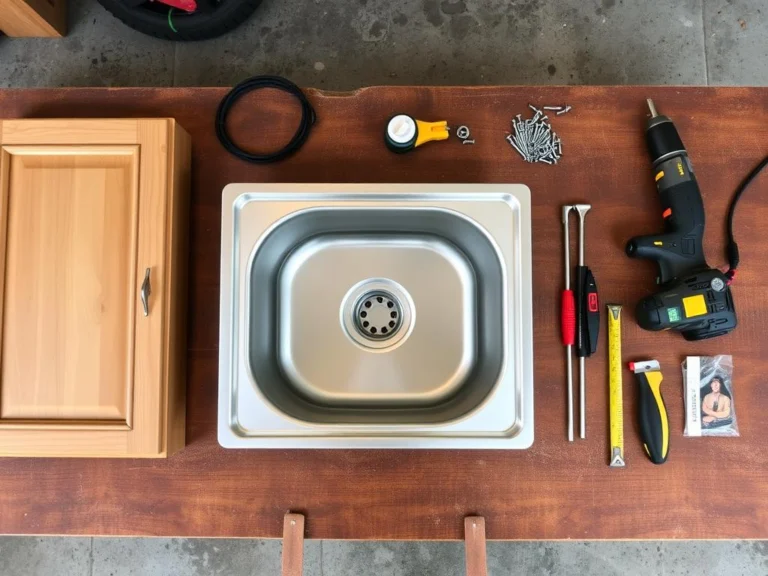
Tools and Materials Checklist
Before starting your installation, gather all necessary tools and materials. Having everything ready will make the process smoother and prevent interruptions.
Essential Tools
- Adjustable wrench
- Channel-lock pliers
- Screwdriver set (Phillips and flathead)
- Drill with bits (for mounting brackets)
- Tape measure
- Teflon tape
- Utility knife
- Level
- Bucket (for catching water during installation)

Materials Needed
- Water filtration system of your choice
- Mounting brackets and screws (if not included)
- Water line connectors (appropriate for your plumbing)
- Shut-off valve (if not already installed)
- Weatherproof enclosure (for under-sink systems)
- Pipe insulation (for cold climates)
- Silicone sealant (waterproof)
- Pipe cutter (if modifying existing plumbing)

Optional Items for Enhanced Installation
For Cold Climates
- Heat tape or heating cable
- Insulated enclosure
- Freeze protection valve
- Weatherproof electrical outlet (for heated systems)
For Monitoring
- Water pressure gauge
- TDS meter (Total Dissolved Solids)
- Water hardness test kit
- Filter life indicator
For Convenience
- Quick-connect fittings
- Color-coded tubing
- Filter wrench
- Spare O-rings and gaskets
Water Testing
Before selecting your filtration system, consider testing your outdoor water supply to identify specific contaminants. This helps you choose a filter that addresses your particular water quality issues.
Home water test kits are available for basic testing, or you can send a sample to a professional laboratory for comprehensive analysis.
Step-by-Step Installation Guide
Follow these detailed instructions to install your outdoor sink filtration system. The steps will vary slightly depending on the type of system you’ve chosen, so we’ve provided specific guidance for each major type.
Preparation Steps (All Systems)
Turn off the water supply to your outdoor sink. Locate the shut-off valve and close it completely.

- Relieve pressure in the line by opening the faucet and allowing any remaining water to drain out.
- Clean the installation area thoroughly and ensure you have adequate lighting and workspace.
- Measure and plan the exact placement of your filtration system, considering access for filter changes and protection from the elements.
Safety First!
Always wear appropriate safety gear, including gloves and eye protection, when working with plumbing tools. If you’re uncomfortable with any aspect of the installation, consult a professional plumber.
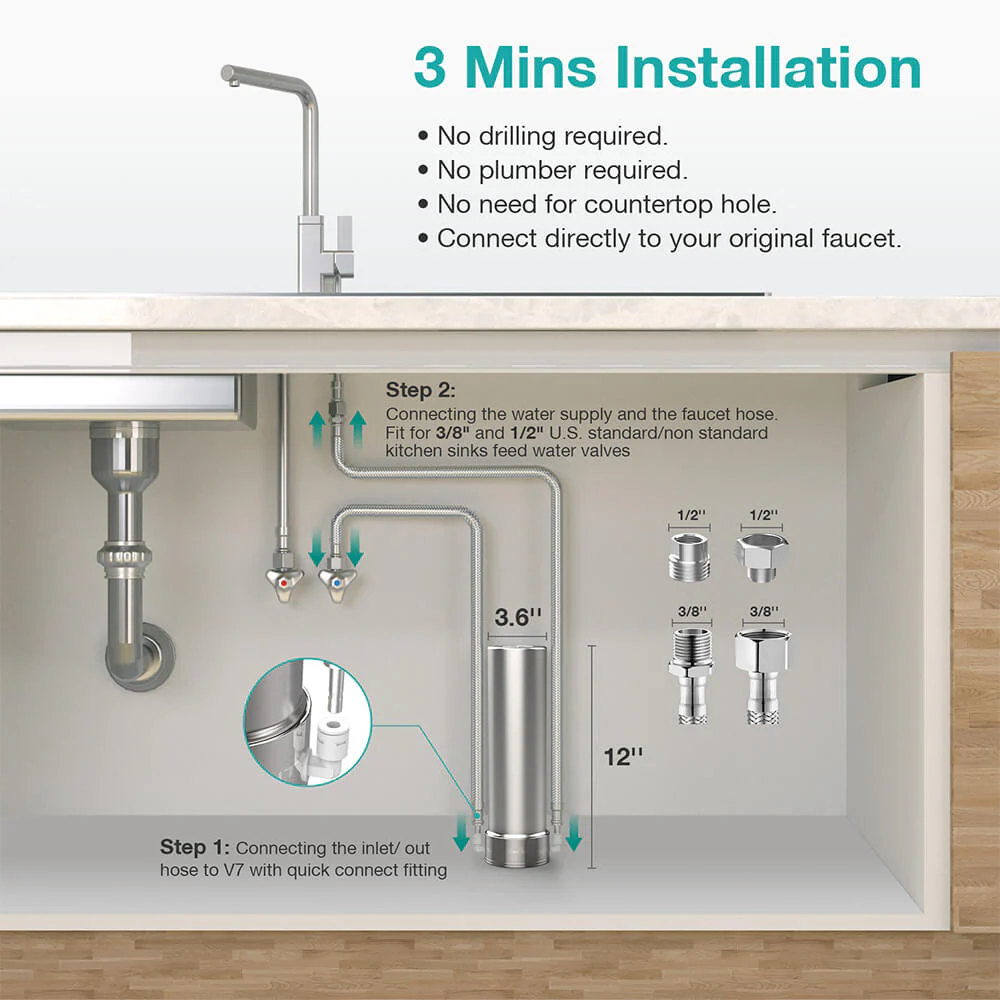
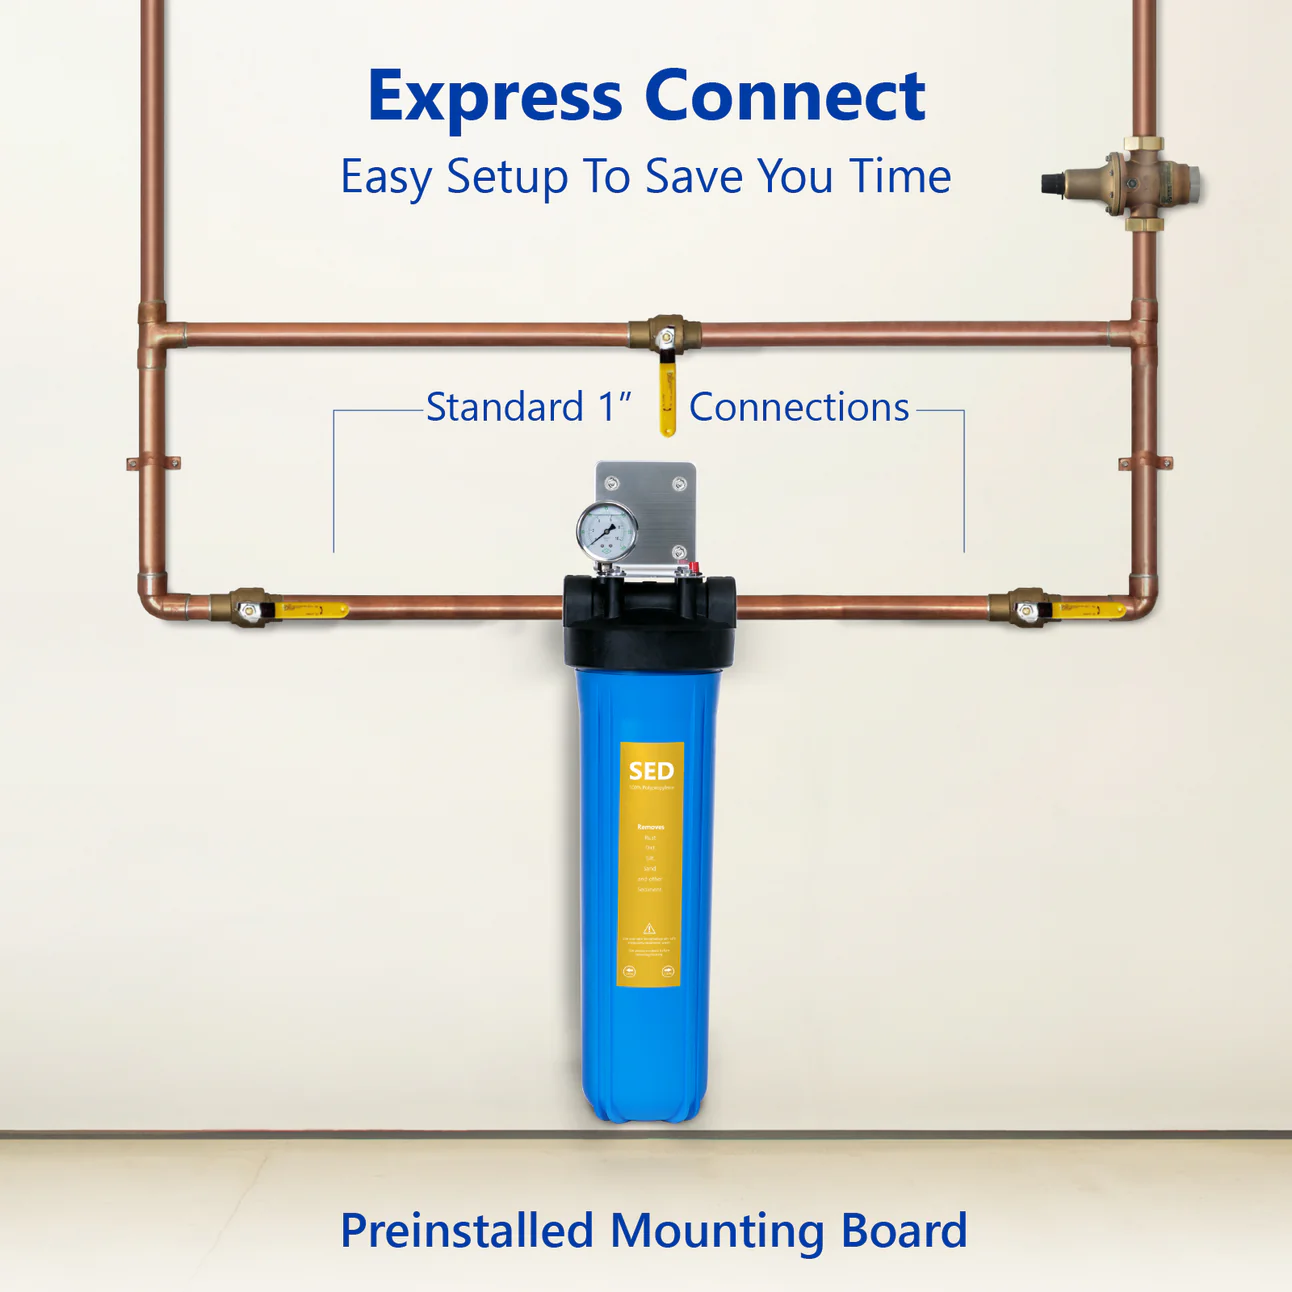
Installing an Under-Sink Filtration System
- Mount the filter housing to the cabinet wall or a suitable surface using the provided brackets and screws. Ensure it’s level and secure.

- Install the water supply adapter at the shut-off valve. Apply Teflon tape to the threads before connecting to prevent leaks.
- Connect the supply line from the adapter to the inlet port on the filter housing (usually marked “IN” or with an arrow).
- Connect the outlet line from the filter housing (marked “OUT”) to your faucet supply line.
- For systems with a dedicated faucet, drill a hole in the sink or countertop according to the manufacturer’s specifications and install the faucet.
- Install the filter cartridge(s) according to the manufacturer’s instructions, making sure O-rings are properly seated.
- Slowly turn on the water supply and check for leaks at all connection points. Tighten as needed.
- Flush the system with water for 5-10 minutes to remove any manufacturing residue or carbon fines.

Installing a Countertop Filtration System
- Remove the aerator from your outdoor faucet.

- Attach the diverter valve to the faucet where the aerator was removed. Use any adapters included with your system if needed.
- Place the filter unit on the countertop in your desired location, ensuring the connecting tubes reach without stretching or kinking.
- Connect the tubing from the diverter valve to the filter unit’s inlet port.
- Install filter cartridges according to the manufacturer’s instructions.
- Turn on the water and activate the diverter valve to direct water through the filter. Check for leaks.
- Flush the system by running water through it for 5-10 minutes.
Installing an Inline Hose Filter
- Identify the installation point on your water line or hose, typically as close to the sink as possible.
- Cut the hose (if necessary) or connect the filter between hose sections using the threaded fittings.
- Apply Teflon tape to the threaded connections if they’re not already sealed.
- Tighten all connections securely with a wrench, taking care not to overtighten and damage the plastic threads.
- Mount the filter (if desired) using brackets or hooks to keep it off the ground.
- Turn on the water and check for leaks.
- Flush the system by running water through it for 2-3 minutes.

Weatherproofing Your Installation
For outdoor installations, protecting your filtration system from the elements is crucial:
For Mild Climates
- Install under a covered area whenever possible.
- Use UV-resistant housing or covers.
- Ensure proper drainage around the installation area.
- Consider a removable cover for additional protection.

For Cold Climates
- Install insulation around pipes and filter housing.
- Use heat tape on exposed pipes.
- Consider a small weatherproof enclosure with a heat source.
- Install drain valves for winterization.
- For seasonal use, plan for easy disconnection and storage.

Maintenance Requirements and Filter Replacement
Regular maintenance ensures your outdoor sink filtration system continues to provide clean water and extends its lifespan. Here’s what you need to know about keeping your system in top condition.
Regular Maintenance Schedule
| Maintenance Task | Frequency | Difficulty | Tools Required |
| Visual inspection for leaks | Monthly | Easy | None |
| Clean filter housing exterior | Monthly | Easy | Damp cloth |
| Check water pressure | Quarterly | Easy | Pressure gauge |
| Replace the sediment pre-filter | 3-6 months | Moderate | Filter wrench |
| Replace the carbon filter | 6-12 months | Moderate | Filter wrench |
| Replace RO membrane (if applicable) | 2-3 years | Moderate | Filter wrench |
| Sanitize system | Annually | Advanced | Sanitizing solution, wrench |
| Winterize system (cold climates) | Seasonally | Moderate | Wrench, air compressor |
Filter Replacement Guide
Different types of filters have varying lifespans. Here’s how to know when it’s time to replace them:
Sediment Filters

Replace when:
- Water pressure noticeably decreases.
- The filter appears visibly dirty.
- Every 3-6 months (depending on water quality).
Replacement process:
- Turn off the water supply.
- Relieve pressure by opening the faucet.
- Use a filter wrench to loosen and remove the housing.
- Replace the filter cartridge.
- Check the O-ring and replace it if necessary.
- Tighten housing and restore water.
Carbon Filters

Replace when:
- Water begins to taste or smell different.
- Every 6-12 months (depending on usage).
- After filtering the manufacturer’s rated capacity.
Replacement process:
- Turn off the water supply.
- Relieve pressure by opening the faucet.
- Remove the filter housing.
- Discard the old carbon filter.
- Insert new filter, ensuring correct orientation.
- Reassemble housing and restore water.
- Flush for 5 minutes before use.
RO Membranes

Replace when:
- TDS (Total Dissolved Solids) levels increase
- Water production decreases significantly
- Every 2-3 years (depending on water quality)
Replacement process:
- Turn off the water supply.
- Disconnect tubing from membrane housing.
- Remove housing cap.
- Extract old membrane (may require pliers).
- Insert the new membrane, ensuring it is correctly oriented.
- Reconnect the tubing and restore water.
- Flush system for 24 hours or per manufacturer’s instructions.
Winterization for Cold Climates
If you live in an area with freezing temperatures, proper winterization is essential to prevent damage to your outdoor filtration system:
- Turn off the water supply to the outdoor sink and filtration system.
- Open the faucet to drain any remaining water from the lines.
- Remove filter cartridges and store them indoors in a clean, sealed container.
- Drain all water from the filter housings and pipes. Use an air compressor, if necessary, to blow out any remaining water.
- Leave drain valves open or disconnect pipes to prevent pressure buildup if any remaining water freezes.
- For permanent installations, consider adding antifreeze designed for potable water systems (follow manufacturer recommendations).
- For removable systems, disconnect and store the entire unit indoors for the winter.


When to Call a Professional
While many issues can be resolved with DIY troubleshooting, seek professional help if you encounter:
- Persistent leaks that don’t respond to basic fixes
- Electrical issues with powered systems
- Suspected damage to your home’s leading plumbing
- Water quality issues that persist after filter replacement
- Significant drop in water pressure throughout your home
Cost Analysis of Different Filtration Options
Understanding the costs involved in different outdoor sink filtration systems helps you make an informed decision that fits your budget and needs. Here’s a breakdown of initial and long-term expenses:
| Filtration System Type | Initial Cost | Annual Maintenance Cost | Installation Difficulty | Lifespan | Best For |
| Inline Hose Filter | $20-$50 | $30-$60 | Very Easy | 1-2 years | Basic filtration, temporary setups |
| Countertop System | $50-$200 | $60-$120 | Easy | 3-5 years | Renters, seasonal use |
| Under-Sink Basic Filter | $100-$300 | $50-$100 | Moderate | 5-10 years | Permanent installations, moderate filtration needs |
| Under-Sink Reverse Osmosis | $200-$600 | $100-$200 | Challenging | 10-15 years | Maximum filtration, permanent outdoor kitchens |
| Gravity-Fed System | $250-$400 | $40-$100 | Easy | 10+ years | Areas without water pressure, emergency backup |
Cost-Saving Tips
Initial Purchase
- Look for bundle deals that include replacement filters
- Consider last year’s models, which often go on sale
- Check for manufacturer rebates or special offers
- Purchase during seasonal sales (spring/early summer)
- Buy DIY kits rather than pre-assembled systems

Ongoing Maintenance
- Buy replacement filters in bulk
- Subscribe to filter replacement programs for discounts
- Extend pre-filter life with a whole-house sediment filter
- Clean and reuse filter housings properly
- Install a water pressure regulator to prevent damage
- Properly winterize to avoid freeze damage

Return on Investment Analysis
Consider these factors when evaluating the long-term value of your filtration system:
Cost Comparison to Bottled Water
A typical family using 24 gallons of bottled water per month spends approximately:
- Bottled water: $300-$600 per year
- Basic filtration system: $150-$250 first year, $50-$100 subsequent years
- Potential savings: $150-$550 annually
Most outdoor filtration systems pay for themselves within 6-18 months compared to buying bottled water.
Property Value Enhancement
A well-designed outdoor kitchen with quality fixtures, including filtration:
- Can recover 71% of the investment at resale
- Makes property more attractive to buyers
- Adds to overall outdoor living appeal
- Provides practical functionality that buyers value
Permanent, high-quality installations offer the best return on investment.
Environmental Impact
Beyond financial considerations, filtration systems reduce:
- Plastic waste from bottled water
- Carbon footprint from bottle manufacturing and transport
- Water waste (compared to some commercial filtration processes)
The environmental return on investment continues to grow over the system’s lifetime.
Safety Considerations for Outdoor Plumbing Work
Safety should always be your top priority when installing and maintaining an outdoor sink filtration system. Follow these guidelines to prevent injuries and ensure a successful installation.
Personal Safety
- Wear safety glasses to protect your eyes from debris and water spray
- Use work gloves to prevent cuts and provide better grip
- Wear appropriate footwear with non-slip soles
- Keep a first aid kit nearby
- Work with adequate lighting
- Stay hydrated and take breaks during installation

Tool Safety
- Inspect tools before use for damage
- Use the correct tool for each task
- Keep cutting tools sharp (dull tools require more force)
- Secure power tools when not in use
- Follow the manufacturer’s instructions for specialized tools
- Keep electrical tools away from water
- Store tools properly after use

Water System Safety
- Always turn off the water supply before beginning work
- Relieve system pressure before disconnecting pipes
- Be aware of electrical lines near digging areas
- Use approved materials for potable water
- Follow local plumbing codes
- Test for leaks before finalizing installation
- Label shut-off valves for future reference

Electrical Safety for Powered Systems
Some filtration systems, particularly those with UV sterilizers or heating elements, require electrical connections. Take these precautions:
- Use only GFCI (Ground Fault Circuit Interrupter) outlets for outdoor electrical connections
- Keep electrical connections above potential water levels
- Use weatherproof covers for all outdoor outlets
- Follow the manufacturer’s instructions for electrical requirements
- Consider hiring a licensed electrician for new outdoor outlet installation

Warning: Water and Electricity Don’t Mix
Never handle electrical components with wet hands or while standing in water. Always disconnect power before servicing any electrical components of your filtration system.
If you’re uncomfortable working with electrical connections, hire a professional electrician to ensure safe installation.
Chemical Safety
When sanitizing your system or using cleaning agents:
- Use only sanitizers and cleaners approved for potable water systems
- Follow manufacturer’s dilution instructions precisely
- Wear gloves and eye protection when handling chemicals
- Store chemicals in their original containers
- Keep chemicals away from children and pets
- Thoroughly flush the system after sanitizing
- Dispose of chemical containers properly
When to Call a Professional
While many outdoor filtration systems can be installed as DIY projects, some situations warrant professional help:
DIY-Appropriate Scenarios
- Basic inline filter installation
- Countertop system setup
- Simple under-sink systems with clear instructions
- Filter replacements and basic maintenance
- Minor troubleshooting and leak repairs
Call a Professional When
- Modifying main water lines.
- Installing new outdoor plumbing.
- Working with electrical connections.
- Complex reverse osmosis installations.
- Persistent leaks or water pressure issues.
- Any work that violates warranty terms.
Conclusion: Enjoying Your Filtered Outdoor Water
Installing an outdoor sink filtration system is a rewarding project that enhances your outdoor living space and provides numerous benefits. With clean, filtered water readily available, you’ll find yourself spending more time outdoors, enjoying activities like gardening, cooking, and entertaining with greater ease.
Remember that the key to long-term satisfaction with your system is proper maintenance. Set reminders for filter changes, perform regular inspections, and address any issues promptly. With proper care, your outdoor filtration system will provide years of clean, great-tasting water.
Whether you’ve opted for a simple inline filter or a comprehensive reverse osmosis system, you’ve invested in both convenience and water quality. As you enjoy the benefits of your new outdoor sink filtration system, you’ll wonder how you ever managed without it.
Related Articles
1- How to Connect an Outdoor Sink to a Water Supply in 5 Easy Steps
2- How to Install an Outdoor Sink Easily – 7 DIY Steps You Can Follow
3- How to Add Hot Water to an Outdoor Sink