How to Build the Perfect Outdoor Bar with Sink: A Complete Guide
Key Benefits of Adding a Sink to Your Outdoor Bar
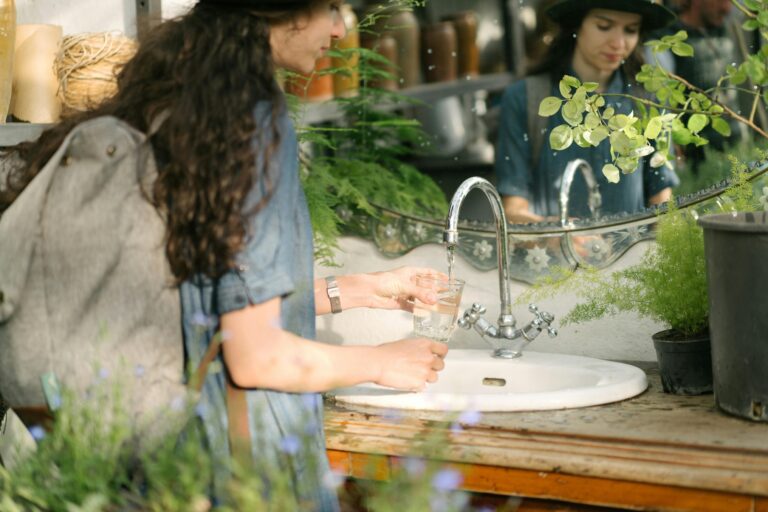
An outdoor bar with sink offers numerous advantages that enhance both functionality and entertainment value. Understanding these benefits will help you make informed decisions during the design and building process.
Enhanced Convenience
With an outdoor sink, you’ll eliminate constant trips indoors for water access. Wash fruits, rinse glasses, and clean up spills without leaving your guests. This seamless experience keeps the conversation flowing and ensures you’re always part of the action.

Improved Hygiene
Outdoor cooking and dining require proper hand washing facilities. An integrated sink allows guests and hosts to maintain hygiene standards without disrupting the flow of entertainment. This is especially valuable when handling food, mixing drinks, or serving multiple courses.

Elevated Entertainment Value
A fully-equipped outdoor bar with sink creates a professional entertainment zone. Prepare garnishes, mix cocktails, and clean as you go – all while engaging with your guests. This restaurant-quality experience impresses visitors and makes hosting effortless.

Ready to Enhance Your Outdoor Living Space?
Explore our curated selection of outdoor sink options designed for durability and style.
Design Inspiration: 5 Creative Layouts for Outdoor Bars with Sinks
Finding the right design for your outdoor bar with sink depends on your available space, budget, and entertainment style. Here are five inspiring layouts to help you envision the possibilities for your backyard oasis.
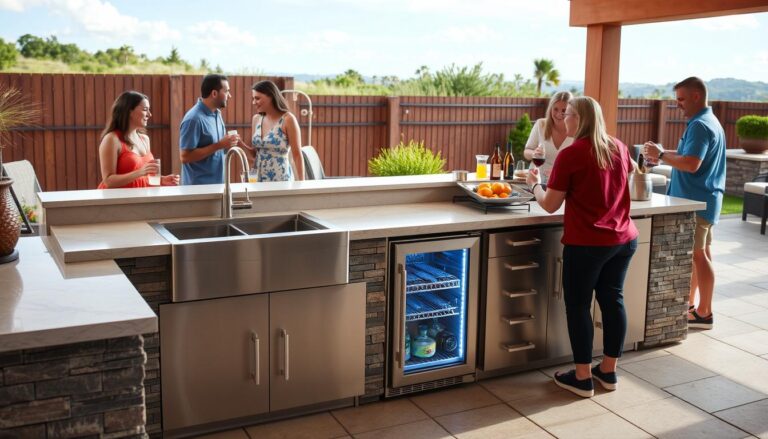
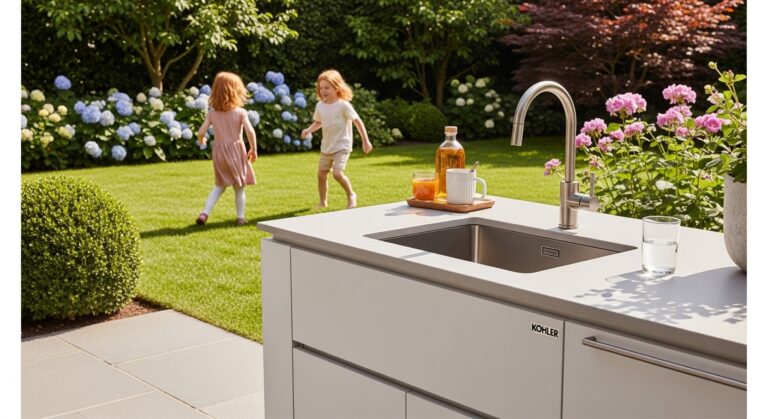
1. The Island Entertainer
Dimensions: 8′ x 4′ island with 15″ x 20″ sink
Materials: Stainless steel sink, natural stone countertop, weather-resistant cabinetry
This freestanding design creates a central gathering point with 360° access. The island configuration allows for a sink on one side and a serving area on the opposite side, making it perfect for interactive entertaining. Include bar stool seating on one or two sides to create a conversational atmosphere.

- Perfect for larger patios and open spaces
- Excellent for hosts who like to interact while preparing drinks
- Requires dedicated plumbing lines to the center of the space
- Typically requires 150-200 square feet of patio space
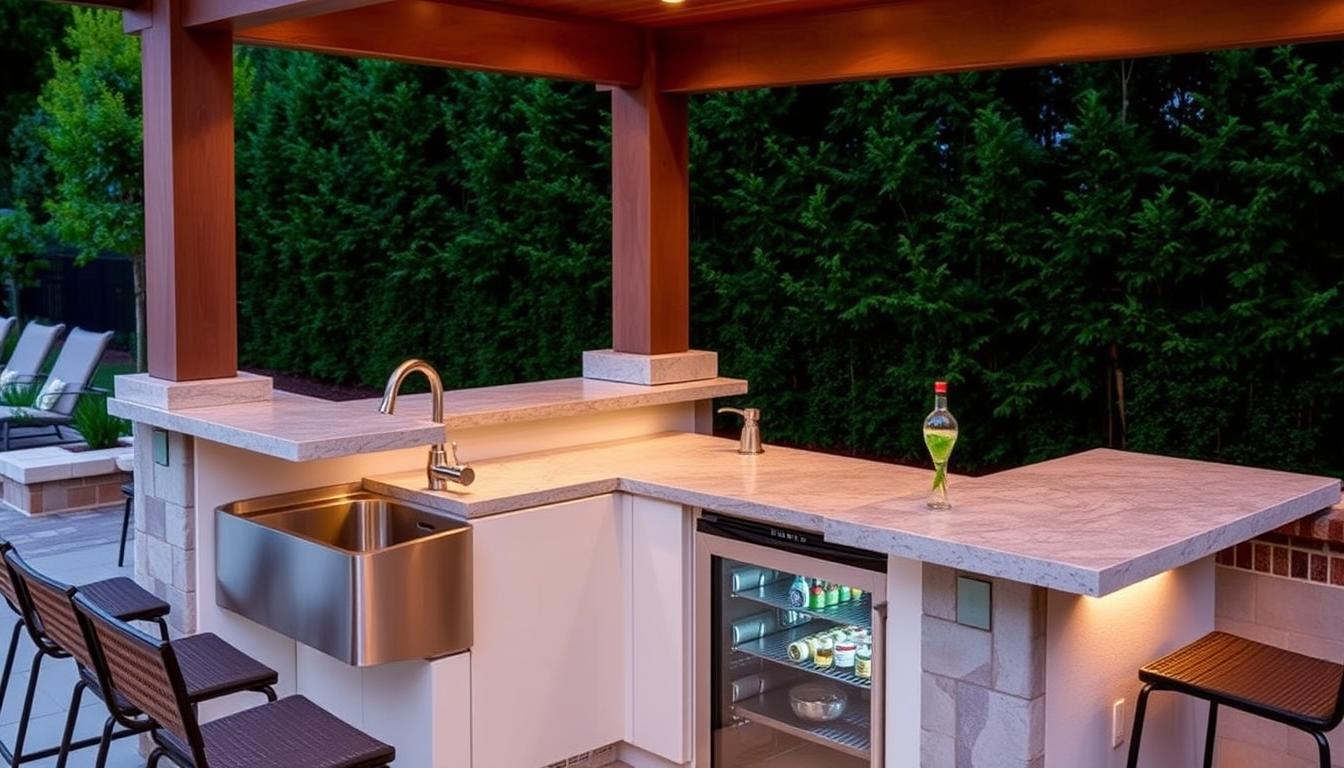
2. The L-Shaped Corner Bar
Dimensions: 6′ x 6′ with 15″ x 15″ sink
Materials: Composite granite sink, concrete countertop, cedar or teak cabinetry
Maximize corner spaces with this efficient L-shaped design. Position the sink at the corner junction for easy access from both sides. This layout provides ample counter space for preparation and serving while fitting neatly into existing landscape features.

- Efficient use of corner spaces
- Creates a natural work triangle between sink, prep area, and grill
- Typically requires 100-120 square feet
- Can be built against existing walls or structures
3. The Compact Linear Bar
Dimensions: 5′ x 2′ with 13″ x 15″ sink
Materials: Stainless steel bar sink, tile countertop, metal frame with composite panels
Perfect for smaller spaces, this streamlined design places the sink at one end of a straight bar. The linear layout can be positioned against a wall or railing, making it ideal for balconies, small patios, or pool areas where space is limited but functionality is essential.

- Ideal for spaces with limited square footage
- Can be built as a DIY project with basic skills
- Requires only 30-50 square feet of space
- Optional fold-down countertop extension for flexibility
4. The Integrated Grill Station
Dimensions: 10′ x 3′ with 21″ x 20″ sink
Materials: Large-format stainless steel sink, granite countertop, stone or brick structure
Combine your grilling and bar areas with this comprehensive outdoor kitchen design. Position the sink between the grill and prep areas to create an efficient workflow. This layout is perfect for serious entertainers who want a complete outdoor cooking and serving solution.

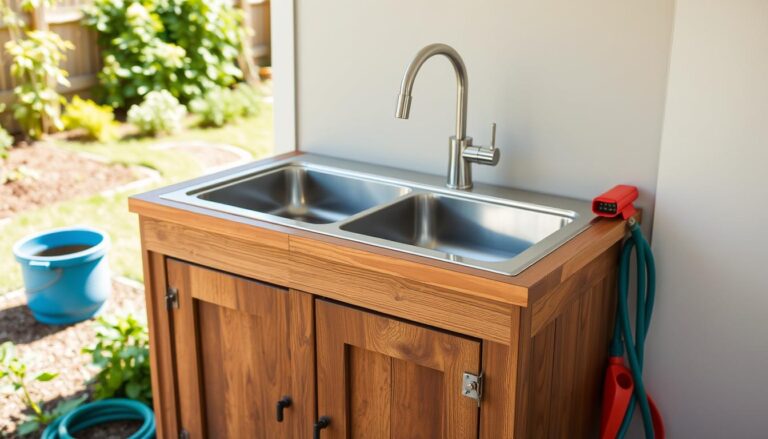
5. The Mobile Bar Cart with Sink
Dimensions: 4′ x 2′ with 12″ x 12″ sink
Materials: Compact stainless steel sink, butcher block top, weatherproof wheeled cart
For maximum flexibility, consider a mobile solution with a self-contained water system. These innovative designs include a freshwater tank and gray water collection, allowing you to position your bar anywhere in your outdoor space. Perfect for renters or those who want versatility in their entertainment setup.

Plumbing Requirements: Installing Your Outdoor Sink System
The plumbing system is the heart of your outdoor bar with a sink. Proper installation ensures functionality and longevity while preventing costly water damage. Follow this step-by-step guide to set up your outdoor sink plumbing correctly.
Important: Always check local building codes and permit requirements before beginning any plumbing work. Many jurisdictions require permits for outdoor plumbing installations, especially when connecting to existing water lines.
Step-by-Step Installation Guide
- Plan Your Water Supply
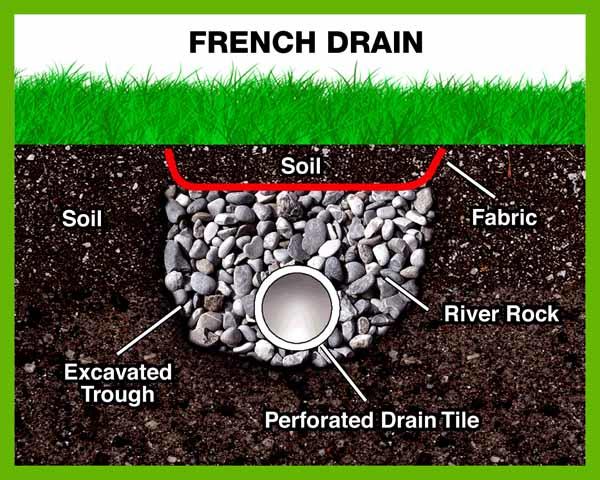
Determine whether you’ll tap into existing home plumbing or create a standalone system. For permanent installations, connecting to your home’s water supply provides the most reliable solution. Identify the nearest water source, typically an exterior hose bibb or interior supply line. - Determine Drainage Options
Outdoor sinks require proper drainage. Options include connecting to your home’s sewer system, installing a dry well, or using a gray water collection system for garden irrigation (where permitted by local codes). - Prepare for Freeze Protection
In cold climates, install shut-off valves and drainage points to prevent pipe freezing. Consider heat tape for exposed pipes or design the system for complete winterization. - Dig Trenches for Supply Lines
For permanent installations, dig trenches at least 12″ deep (or below the frost line in cold climates) to run PEX or copper supply lines from your water source to the sink location. - Install Supply Lines
Connect flexible PEX tubing or copper pipes from your water source to the sink location. Use appropriate fittings and ensure all connections are secure and leak-free. - Set Up Drainage System
Install a P-trap beneath the sink and connect it to your chosen drainage solution. Ensure proper slope (¼” per foot) for gravity drainage. - Mount the Sink
Install the sink basin according to the manufacturer’s specifications. For undermount sinks, secure them to the countertop before connecting plumbing. - Connect Faucet and Test
Install the faucet, connect supply lines, and test the system for leaks and proper drainage before finalizing the installation.
Hot Water Options
Adding hot water to your outdoor sink enhances its functionality. Consider these options:
- On-Demand Water Heater: Compact units that heat water as needed, installed near the sink
- Hot Water Line Extension: Connect to your home’s existing hot water system
- Solar Water Heater: Eco-friendly option for sunny locations
- Point-of-Use Tank: Small electric water heater installed beneath the sink
Tools & Materials Needed
- Pipe cutter and PEX crimping tool
- Adjustable wrench and channel locks
- Teflon tape and pipe joint compound
- PEX tubing or copper pipe
- P-trap and drainage pipes
- Shut-off valves
- Pipe insulation (for cold climates)
- Shovel and trenching tools
Material Recommendations for Your Outdoor Bar with Sink
Selecting the right materials for your outdoor bar with sink is crucial for longevity and performance. Outdoor elements like UV rays, moisture, and temperature fluctuations demand specialized materials that can withstand these challenges while maintaining their appearance.
Sink Material Comparison
| Material | Durability | Maintenance | Cost Range | Best For |
| 304 Stainless Steel | Excellent | Low | $200-$600 | All-purpose use, high traffic areas |
| 316 Marine Grade Stainless | Superior | Very Low | $400-$900 | Coastal areas, salt exposure |
| Copper | Very Good | Medium | $500-$1,200 | Aesthetic focus develops patina |
| Granite Composite | Very Good | Low | $300-$700 | Color options, scratch resistance |
| Concrete | Good | High | $200-$500 | Custom shapes, industrial look |
Weather-Resistant Countertop Options
Granite
Natural stone that withstands heat, UV exposure, and moisture. Requires annual sealing but provides unmatched elegance and durability. Available in countless colors and patterns.

Concrete
Highly customizable material that can be formed to any shape. Can be stained, stamped, or embedded with decorative elements. Requires proper sealing and maintenance to prevent cracking.

Porcelain/Ceramic Tile
Excellent weather resistance and virtually maintenance-free. Available in countless styles, colors, and patterns. Grout lines require occasional cleaning and resealing.

Cabinet and Structure Materials
The supporting structure of your outdoor bar needs to withstand the elements while providing stable support for your countertop and sink.
- Marine-Grade Plywood: Treated to resist moisture and insects, ideal for cabinet construction when properly sealed and finished
- Stainless Steel Frames: Rust-resistant and extremely durable, perfect for modern designs
- Polymer Cabinets: Maintenance-free synthetic materials designed specifically for outdoor use
- Natural Stone: Permanent option for built-in bars with excellent durability
- Tropical Hardwoods: Naturally resistant to rot and insects (teak, ipe, mahogany)
- Aluminum: Lightweight, rust-resistant option for frame construction
“When selecting materials for an outdoor bar with sink, prioritize water resistance, UV stability, and temperature tolerance. The most beautiful design will fail if the materials can’t withstand your local climate conditions.”
Real-Life Outdoor Bar with Sink Installations
Learn from these successful outdoor bar projects that showcase different approaches to design, materials, and installation techniques.
Case Study 1: Coastal Retreat Bar
Location: Beachfront property in Florida
Challenge: Creating a durable outdoor bar that could withstand salt air, high humidity, and occasional storm exposure.
Solution: The homeowners selected 316 marine-grade stainless steel for both the sink and supporting structure. The countertop features porcelain tile with epoxy grout for maximum moisture resistance. A custom drainage system directs water away from the foundation and into a landscaped area.

Result: After five years of exposure to coastal conditions, the bar shows minimal wear and continues to function perfectly. The owners report that the sink’s drainage system has prevented any water damage to the surrounding area.
Case Study 2: Urban Rooftop Bar
Location: Chicago apartment building rooftop
Challenge: Installing plumbing in a space with limited access to water lines and drainage while keeping the design lightweight enough for rooftop installation.
Solution: The designers created a modular system using aluminum framing and composite panels. The sink connects to a specialized gray water collection system that filters and reuses water for the rooftop garden. A tankless water heater provides on-demand hot water.

Result: The lightweight design meets building code requirements while providing full functionality. The water recycling system reduces consumption by approximately 80% compared to traditional drainage.
Case Study 3: Mountain Retreat Bar
Location: Colorado vacation home
Challenge: Creating a four-season outdoor bar that could withstand freezing temperatures and heavy snow loads while maintaining year-round functionality.
Solution: The homeowners built a covered structure with insulated walls on three sides. The plumbing system features electric heat tape, insulated pipes, and comprehensive drainage for winterization. The granite countertop and stainless sink are designed to handle extreme temperature fluctuations.

Result: The bar functions year-round with simple winterization procedures when temperatures drop below freezing. The covered design allows for use even during light snow, extending the outdoor entertainment season significantly.
Maintenance Tips for Your Outdoor Bar with Sink
Proper maintenance ensures your outdoor bar with sink remains functional and attractive for years to come. Follow these seasonal care guidelines to protect your investment from the elements.
Seasonal Maintenance Checklist
Spring Preparation
- Reconnect water lines if winterized
- Check for leaks in all connections
- Clean and reseal countertops if needed
- Inspect faucet for mineral deposits
- Clean drain and P-trap thoroughly
- Check cabinet hinges and hardware
Summer Maintenance
- Clean sink and countertops regularly
- Inspect for insect nests in cabinets
- Check drainage for clogs from debris
- Apply UV protectant to exposed wood
- Tighten any loose hardware
- Clean faucet aerator if water flow decreases
Fall Preparation
- Clear leaves from the drainage system
- Apply protective covers if not using during winter
- Inspect for water damage or warping
- Reseal grout lines before winter
- Check for loose tiles or countertop sections
- Clean and store removable accessories
Winter Protection (Cold Climates)
- Shut off the water supply at the source
- Drain all water lines completely
- Add non-toxic antifreeze to the P-trap
- Cover sink and countertops
- Remove and store the faucet if possible
- Secure cabinet doors to prevent wind damage
Winterizing Your Outdoor Sink
In regions where temperatures drop below freezing, proper winterization is essential to prevent pipe bursts and damage to your outdoor bar with sink. Follow these steps for comprehensive winter protection:
- Shut Off Water Supply
Locate and close the shut-off valve that controls water flow to your outdoor sink. This is typically located where the line branches from your main home plumbing. - Drain the Lines
Open the outdoor faucet to allow all remaining water to drain from the lines. For thorough drainage, use an air compressor to blow out any remaining water in the pipes. - Protect the P-Trap
Remove water from the P-trap by disconnecting it or using a wet-dry vacuum. Once empty, pour a cup of RV antifreeze (non-toxic) into the drain to prevent any remaining moisture from freezing and cracking the trap. - Disconnect Removable Parts
If possible, remove the faucet and store it indoors during the winter months. This prevents internal components from freezing and extends the life of your fixtures. - Cover the Installation
Use a weatherproof cover designed for outdoor kitchens to protect your bar and sink from snow, ice, and debris during the winter months.
Pro Tip: Take photos of your plumbing connections before disconnecting components for winter storage. This visual reference will make spring reassembly much easier, especially for complex installations.
DIY vs. Professional Installation: Making the Right Choice
Deciding whether to tackle your outdoor bar with sink as a DIY project or hire professionals depends on your skills, available time, and project complexity. This comparison will help you make an informed decision.
| Consideration | DIY Approach | Professional Installation |
| Average Cost | $1,200-$3,500 (materials only) | $3,500-$10,000+ (materials and labor) |
| Time Investment | 2-4 weekends (40-80 hours) | 2-5 days of installation |
| Skill Level Required | Intermediate to advanced | None (handled by experts) |
| Tools Needed | Plumbing tools, power tools, masonry tools | None (provided by contractor) |
| Permitting | The homeowner is responsible for research and applications | Typically handled by a contractor |
| Warranty | Materials only, installation not covered | Typically 1-5 years on workmanship plus material warranties |
| Complexity Handling | Limited by homeowner experience | Can address complex plumbing and structural challenges |
Project Difficulty Assessment
Different aspects of an outdoor bar with sink installation vary in difficulty. This breakdown helps you identify which components you might DIY and which are better left to professionals.
Suitable for DIY
- Simple cabinet assembly and installation
- Drop-in sink installation in a pre-cut countertop
- Faucet mounting and connection
- Basic drainage to existing systems
- Countertop installation (pre-fabricated)
- Finishing touches and accessories
Professional Recommended
- New water line installation
- Complex drainage systems
- Gas line installation (for heaters/grills)
- Electrical work for lighting/appliances
- Custom countertop fabrication
- Structural modifications to existing spaces
“The most successful outdoor kitchen projects I’ve seen combine DIY elements with professional help for critical systems. Homeowners often install cabinets and finishes themselves while bringing in experts for plumbing and electrical work.”
Creating Your Perfect Outdoor Bar with Sink
An outdoor bar with a sink transforms your backyard into a versatile entertainment space that combines convenience with style. Whether you choose a simple DIY project or a comprehensive professional installation, the addition of a functional sink elevates your outdoor living experience.
Remember to consider your specific needs, local climate, and available space when designing your outdoor bar. Choose durable, weather-resistant materials that will stand up to the elements in your region. Plan your plumbing carefully to ensure reliable function throughout the seasons, and develop a maintenance routine that will protect your investment for years to come.
With proper planning and execution, your outdoor bar with sink will become the centerpiece of countless gatherings and a valuable addition to your home. Cheers to creating memorable outdoor experiences!